Photo Editing

Every artistic work starts with a hobby. Isn’t it? Starts with love. You have already clicked on this blog. So, I assume you love photo editing. Or maybe you love to click photos and want to edit them by yourself. Either way, if you are interested in photo editing and want to improve yourself, this blog is just for you. By the title you might have already known, we will talk about how to edit photos like a professional.
There are many reasons why you should learn to edit photos like a professional. If you are a photographer then you know the market is jam packed with photographers as well as photo editors. Knowing the basics is not enough anymore. You need to learn complex editing as well. Otherwise, the clients won’t find any concrete reason to choose you in this competitive market.
You can also learn for yourself. Editing skills are unique skills. And it also needs some special eyes to do so. Not everyone can master photo editing. It has a very high demand in the market and quality is the key to any service and product-related market. You can guess how you can upgrade your value just by knowing the photo editing properly.
If you are a photographer then you can serve all-in-one photography which will include photography and photo post-processing service at the same time. Your clients won’t have to bother about hiring another editing service provider to get the final product. And if you do it out of your hobby then I don’t even need to explain to you why, you will just dive in to learn anyway.
So, whatever your reason is, this blog will help you to know how to edit photos like a professional.
Making photos look professional is the main key here. There are many things you can do with photo editing. But everything needs an organized pattern to follow. So, this would be a good guideline for you.
There are many options which you can choose from. But since we are talking about professional ways to edit photos, we will go for professional editing software as well. Professional editors usually use software like Adobe Photoshop, Adobe Lightroom, VSCO, and some similar software. I personally love to use Adobe Photoshop for professional photo editing. Sometimes Adobe Lightroom as well. But if you feel you can edit like a pro with whatever photo editing software you are working in then go for it. If you can work with comfort then go for it.
Crop is the most basic of image editing. You can easily crop with any software. You might not even need professional software for cropping an image. Any software has a crop option in features. Moreover, you don’t even need software. Phones and some cameras also have crop as an in-build feature in their settings.
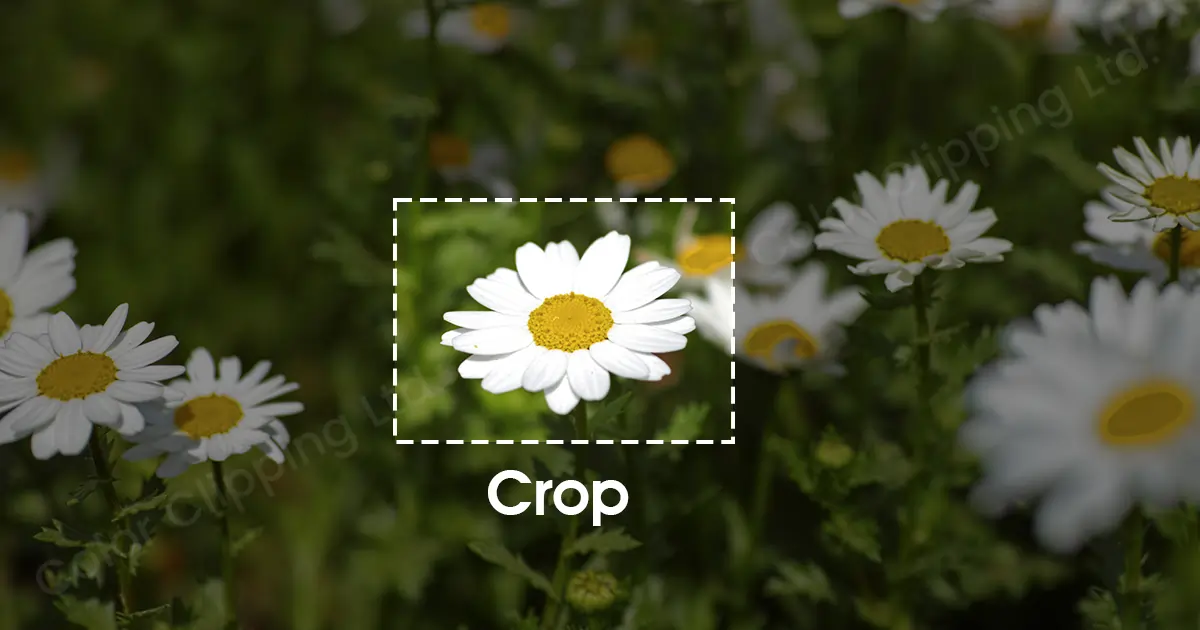
Through this, your picture will have a cleaner look and the main focus will be on the subject only.
Sometimes you will see some pictures that seem like they have been taken in summertime. And some will give you winter-cold vibes. It happens because of the temperature of the picture. If the picture is in a warm tone, then it will give a very settled summer vibe and if it is in a cool tone then the opposite will happen, and will make you feel like clicking the picture in December.
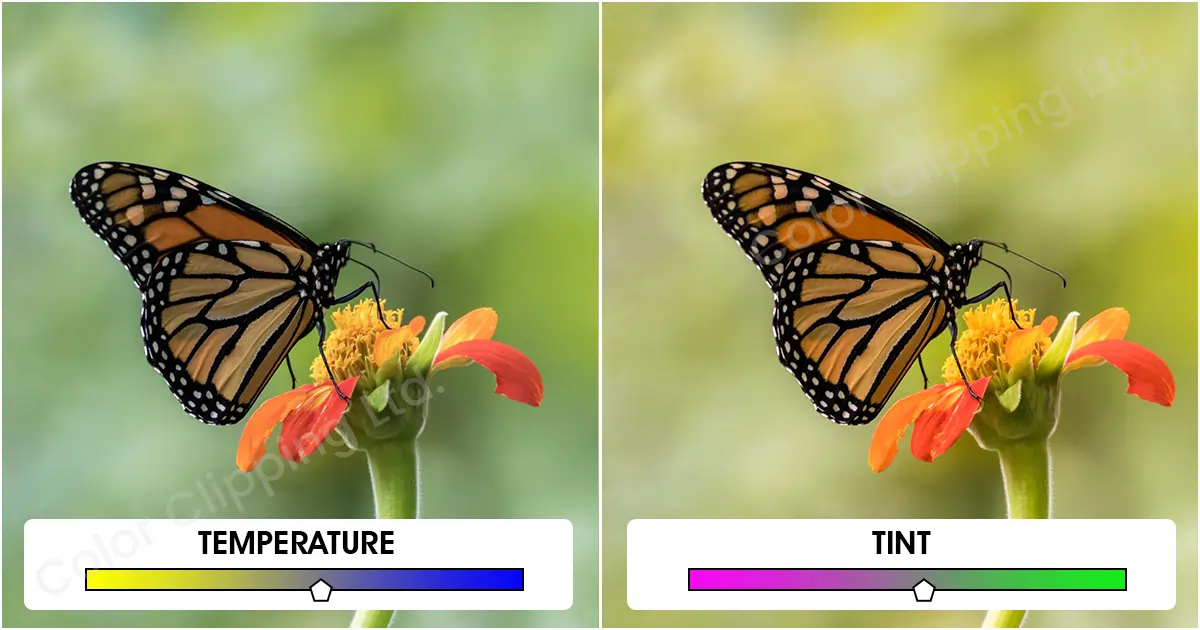
You can put these vibes through photo retouching. When you are thinking about focusing on the subject rather than focusing on the weather or temperature then maintain the white balance. Try to keep it in the middle. Don’t bring up the warmer light like yellow, red, or orange too much if you want to have a little bit of a cool tone in your image. And it goes the opposite as well. But you can experiment with temperature to check the color effects on the picture. you might like some pictures in warmer tones or cool tones that you haven’t thought to apply that way. You can set the white balance in Photoshop.
Adjusting exposure and contrast is also basic editing when you talk about professional photo editing. Now what does these exposure and contrast do? Exposure mainly works on how bright or dark you want to be in the picture. Too much brightness can create "noise" which can destroy the look of the image. Correct exposure is important to give a good focus and an eye-soothing finish to the image.
Contrast is the difference between the lightest and the darkest part of the image. The more differences an image has the higher the contrast level is. You can also take a recoloring service for this correction.
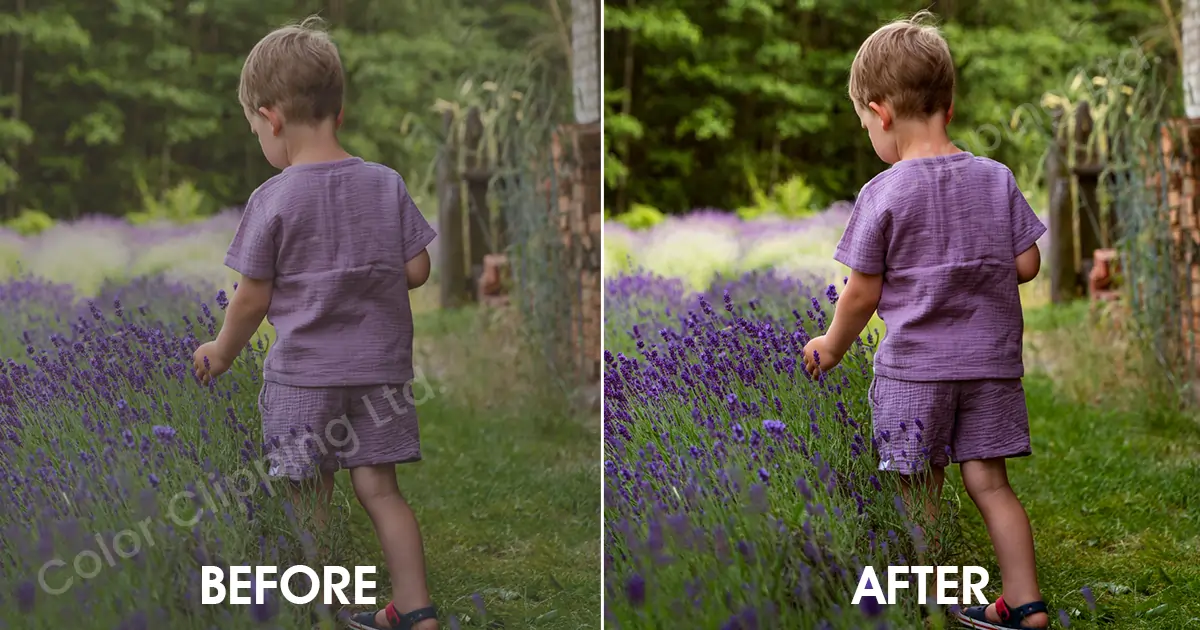
Usually, a highly contrasted image gives a very clear look and gives it more 3D effects. When you edit photos to look professional you can not avoid exposure and contrast. They add a polished look that will scream the word professionalism.
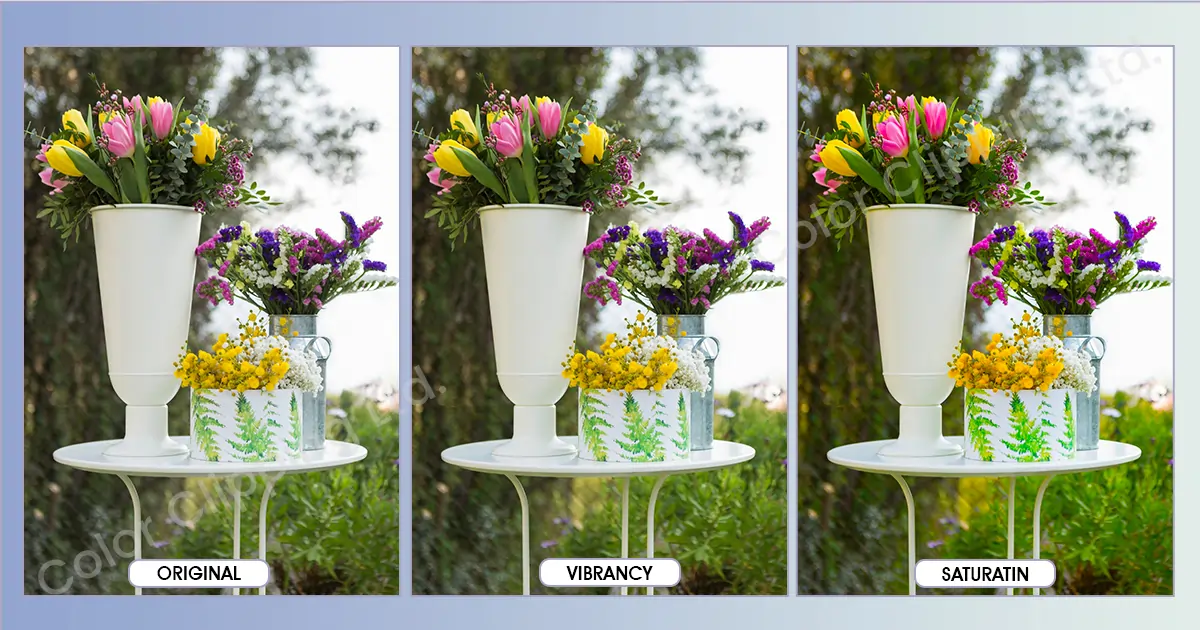
Again comes the color. Bring up the colors. Vibrancy will enhance your color in an image. It brightens up the image. Adjusting the white balance is not enough. After white balance, the image can look dull. Then saturation and vibrancy come in handy to bring back the life in the image. Vibrancy adds the intensity to the image and saturation does the same with a little more intensity.
No matter what you do, always try to Shoot the picture in RAW format. That's how you can edit the image the way you want in the future. And also turn the manual mood on to adjust the setting as you want. The ISO, Aperture, and Shutter speed depend on your photography. What image are you clicking, where are you clicking, and how moving or stable is the subject of your images? To set these settings your camera has to be in manual mode. If you shoot in RAW format, they will be saved as it is. Otherwise, in any other format, it loses some of its originality.
There are many more things to do in photo post-processing techniques. Especially, knowing the software that you are using for editing. Suppose you are using Adobe Photoshop then you should know how to use the pen tool, brush tool, lasso tool, quick selection tool, etc. If you don’t know how to use the tools then you will get slow. To fasten your work, you need to learn and know about the tools as well.
Once you start editing your images it can be intimidating. But you have to focus on not overdoing anything. Too much editing can destroy the enhancement of an image. So, it’s important to know when to stop.
Photo editing is not something that you can learn in 1 or 2 days. It will need patience and lots of practice. You will also see how you improve through the years. Different software works differently. Take your time to understand your software and rock with it.
And lastly, if you are still struggling with photo editing and retouching then why do you worry? leave it on Color Clipping. We will take over all of your worries regarding photo issues.
Deowan Shimul
Since 2010, Deowan Shimul has been refining the art of jewelry retouching, combining precision with advanced technology. In 2017, he expanded his expertise into commercial product photography and now leads a team of 120 professionals. Together, they produce high-quality visual solutions that help brands grow, streamline workflows, and achieve real results for clients worldwide.

Chief Production Officer