8 Best Camera Settings | Professional Product Photography

Read | Loved by: 108162
Wondering how to set up camera for product photography? I wish I could say Grab your camera and click click click, but I can’t! Because you need to preset camera for professional looking product photography. However, I can say here is the guide to Best Camera Settings for Professional Product Photography! Get enlightened and produce excellence!
Camera Settings for Product Photography in E-Commerce
My ideal camera settings for product photography are meant to highlight the object vividly. I want the product to look exactly as it is, yet stunning. Because that’s what the customers want, they believe in the image and order the product. So in e-commerce photography, you must keep the word ‘authenticity’ in mind. Another prime responsibility goes to the team of photo retouchers. They have to clean the image in post-processing and make it perfect.
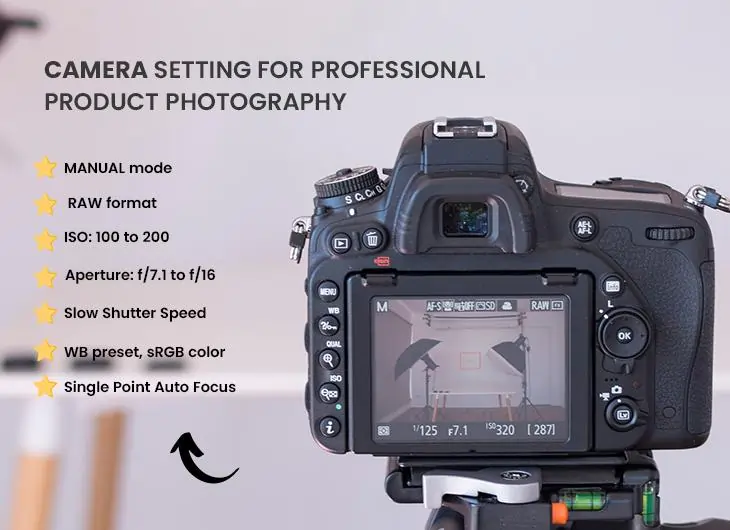
Let’s look at what my camera setting for e-commerce photography looks like.
- Shoot in a MANUAL mode, color mode:sRGB
- Shoot in RAW format
- ISO: 100 to 200 (as low as possible)
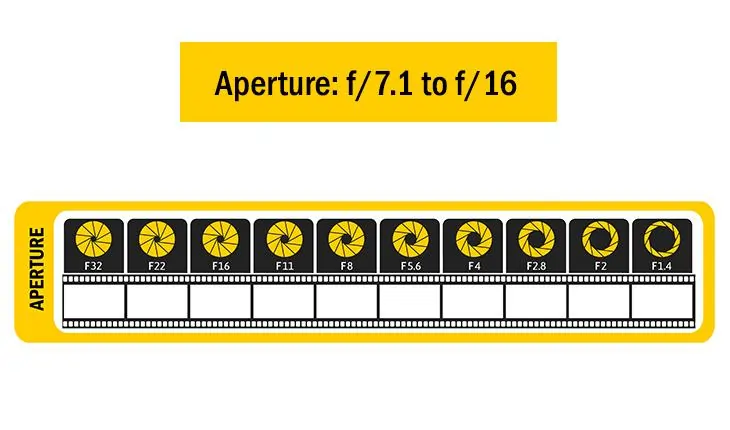
- Aperture: f/7.1 to f/16 for sharp photo
- Depth of Field
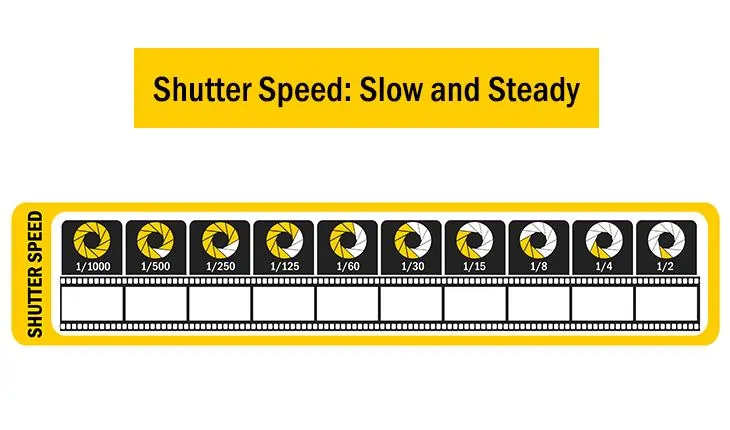
- Shutter speed: slow and steady (1/13, on a tripod)
- Use White Balance Preset(for correct white balance )
- Single Point Autofocus (AF)
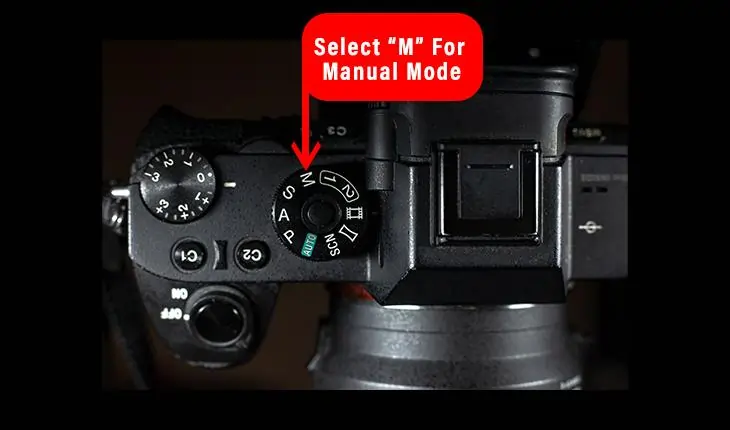
1. Shoot in A MANUAL Mode
It is always recommended to keep your camera in manual mode while photographing a product. Because choosing a manual mode means you can set the exposure triangle as required for the photo. On the other hand, if you select auto mode, the camera will decide the setting. The camera still is not sensible as humans, so they can’t bring the best outcome. Thus it is best to operate your camera in manual mode. Don’t forget to set the color mode in sRGB. That's a crucial part of product photography. Now you are all set to bring the vibe you mean to produce in the photo!
2. Shoot in RAW Format
Shooting in raw format means selecting the image format in RAW. When you choose RAW format, the click will be saved in RAW format. In RAW format, images are stored in the highest resolution. The image in RAW format in the largest size is best for post-processing. This is why the photo editors will ask only RAW format for retouching your photo. Always store your image in the largest file format your camera offers. I also highly recommend using a high-quality color checker to capture the exact color.
3. ISO: 100 to 200 (as low as possible)
Keeping your ISO low is preferable in product shooting. The higher your ISO goes, the more grain your photo from the noise. It is always suggested to keep your ISO 100 to 200 for better image quality. Since your product photography setting is well-lit, you will not even need a higher ISO. But if it is low light for any kind of composition, you can have a higher ISO that should not exceed 800. However, depending on the light, you might need to increase it gradually. Using a tripod is a wise decision.
4. Aperture: f/7.1 to f/16
The aperture is like the pupil of our eyes. If we try to shrink our eyes and look at something, we can see it more transparently. Through the aperture, light enters the lens. So the large the opening of the aperture, the more light enters. Conversely, the narrow the opening, the less the light. Aperture is counted with the f-stops. With the increasement of f numbers, the opening gets narrowed. Meaning the more the f-stop numbers are, the smaller the opening gets. The smaller the f stops are, the larger the opening is. So, for product photography, keep your aperture from f/7.1 to f/16.
5. Depth of Field
Aperture is related to the depth of field. A shallow opening will create a deeper depth of field. A wider aperture or small f stop number will make a shallow depth of field. Now, in shallow depths of the field, some points of the image will be blurred while focusing on a specific thing. On the other hand, a deep depth of field means most of the scene of the image will be in focus.
So in product photography, you might want to have the product in focus. So, f/7.1 to f/16 will give you the desired focus on a white or plain background. If the background is not white or plain, try a wider aperture. A wider aperture will isolate the product and bring the subject into focus.
6. Shutter Speed: Slow and Steady (1/13, on a tripod)
The shutter is the curtain of your camera lens. Shutter speed means the fraction of time the shutter is open for clicking the photo. When the shutter opens, the light enters, hits the camera sensor, and takes pictures.
For a motionless object, you choose a slow shutter speed known as a long shutter. On the other note, you use a fast shutter speed to freeze a moving object in your camera sensor. So, for product photography, you do not need to capture movement; hence you can use a slow shutter speed of 1/13. Then you have to adjust it as per the light meter. To avoid shakiness, make sure to set your camera on a tripod.

7. Use White Balance Preset
White balance determines the balance of color in your photo. It is essential to portray every color just as it is. If the white balance is incorrect, you can’t find the accuracy of other colors. Your camera may have multiple white balance settings, including auto, preset, or customize. Choosing a preset white balance always works for me.
The camera suggests an approximate white balance based on some general light tones. You will see some icons upon pressing WB (White balance) button. Selecting one of these matching with the light you are shooting in will bring the exact white balance.

8. Single Point Auto Focus (AF)
You need the sharpest picture for photographing a product. And choosing a full AF is one of the best choices for a crisp photo. But your goal is to feature your product. Hence, instead of a full AF, I suggest going for single-point autofocus. Because it will keep the product in focus and capture all the detail thoroughly, taking a full AF may distract the view of the product. You can rely on your camera more than yourself for a precise focus in that scenario.
Once you are done with the camera setting, check the setup and start clicking. Click until you get the best photo of the day. This is not the end of the story because the picture needs to be retouched by professionals. Always handle the raw image to the editors, and they will make the high-quality image done!
Pro Tips
- Set the place well-lit where you are going to click photos
- Use a white background for taking product photos
- Soften light with foam box or bounce card if needed
- Do not zoom in; go closer to the product instead
- Never use the camera flashlight; you can use other flashes to enhance lighting, but the flash will ruin the snap.
Product photography is challenging because you must make a photo look catchy while portraying the product's natural sight. You must bring the right color, shape, and angles and make the product look EXCELLENT because the image needs to be clicked, purchased, and sold with a reputation. Your knowledge of camera settings for pro product photography can MAKE or BREAK the game. But, since you are in the last line of this Camera Settings for Professional Product Photography blog, the word should be “MAKE,” right?

Faria Ahammed Juthi
Hi, it's Faria, Content Executive from Color Clipping Ltd with a passion to contribute knowledge sharing more simply. Keep learning and growing with us.
Categories
Tag Cloud
Latest Stories