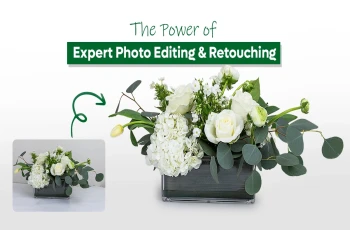
Photo Editing

Can you name a few skincare brands which are currently the game changers of the market? There are tons of names you can think of which can include Neutrogena, The Ordinary, Cetaphil, Tatcha, Olay, Vaseline, Bath and Body Works, Aveeno, CeraVe, The Body Shop, and many more. They are currently the top-notch brands in the skincare game. But how do they sell their product worldwide, since it’s hard to convince a customer through a screen to buy their product without testing? The answer is simple and easy, Skincare Product Photography.
If you look at the brands’ promotions, advertisements, or websites, you will see some clean and fresh photos of their products. They almost make you feel, you are holding the product by yourself and you can almost feel the texture of the product.
You may find many blogs and tutorials on this specific topic. And most of them will be very useful tips for you. But let me share with you the techniques and steps which I follow for the skincare product shoot. I found it way easier to complete work when I already know which step comes next. That’s why I will go through a “step-by-step” process which I follow for skincare or beauty product photography.
Nothing goes wrong when you have a proper plan to begin with. Take a pen and paper. You don’t have one? Okay, digital peps… Pull out your notepad, and start writing. What product is your model? By model I mean which is going to be your next project?What is the theme of the shoot, and what are the focus points, what colors to go for? Kind of what will make their signature look. Jot down the points that are must-haves in any product.
For example - look at Vaseline. You will always find their signature blue in their advertisements and promotions. If not directly then sure indirectly. So, find what is the signature look/theme of the product that you are working with.
Also wrote the steps serial-wise. That way it will make your work speed go even faster. (You can follow this blog’s step serial for the steps or also can customize your own as you preferred)
Remember, one small thing can ruin your entire work. At the same time, one small detail can make your product look outstanding. So, always clean your product before shooting.
Dusts left on the product can not be noticed in bare eyes but it can be destructive when it would be captured with a high-end camera. It can drastically change the customer’s perception of the product. So, keep the product clean.
If your product is small in size then use cotton buds to clean the surface. And also make sure to use gloves while holding the products. Since the fingerprints can also be seen on the products. It’s always better to be safe.
Prepare the product. Polish the bottles and jars that the skincare care brand is providing. Glass jars like Olay have, can easily hold fingerprints and dust. So, it’s also important to not only polish but also re-polish while shooting.
Lighting will bring the mood to the picture. Every color has something to say. Every color has its own personality. Look at Red. What vibes does it give you? Do you think it symbolizes Love? Or anger or passion or warnings? Or evil? Well, even though red symbolizes all of the above it depends on the perception of the viewers. Still, you can guide the audience with colors to voyage their perception with the story.
Just like that, if you want to warn the customer about something, then you can choose the color red. Or if your product is cruelty-free then you can go for green lighting to provide a positive vibe.
But these techniques might not work every time for skincare products and also brand color might contradict the color you will choose for the vibes. So, there are also some easy-to-go options.
You can go for gradient lighting. It will eventually give more character to the subject and would make the photo more interesting. Gradients work great on cosmetics and skincare product photography. Especially, if the packaging or the bottle or the jar of the product is reflective or glossy.
You can use artificial lighting if you want to, yet try to use soft lights which almost give you a natural-like finish. Or go for the easiest way. Go to the most sun-exposed area of your house or studio (wherever you are shooting) and wait for the golden hour to shoot. The light will give a natural yet soothing vibe.
Now you can play with your composition. At this moment you might have already gathered some idea about what you are going to do or how you want to place your products. Because skincare product photography can be tricky to shoot, since the theme might not fit exactly with the product. So, you have to be careful to make it as relevant as possible. What will be the background or the props that you want to use. But we will discuss that later.
Compose your product’s placement seamlessly. Place your product, but not all of them in an obvious way. Take more than one bottle, and place them in different patterns and positions. For example, if one bottle is standing then put down the other one in a position as it is laying on the ground. Make the positions look symmetrical to the viewers. This will make the view look effortless subconsciously. Look at Cera ve’s product images. You will see the simplicity in their brand promotions.
In my opinion, it’s very important to keep the product as natural looking. The more natural and effortless it will look the more transparency the clients/customers will feel towards the brand.
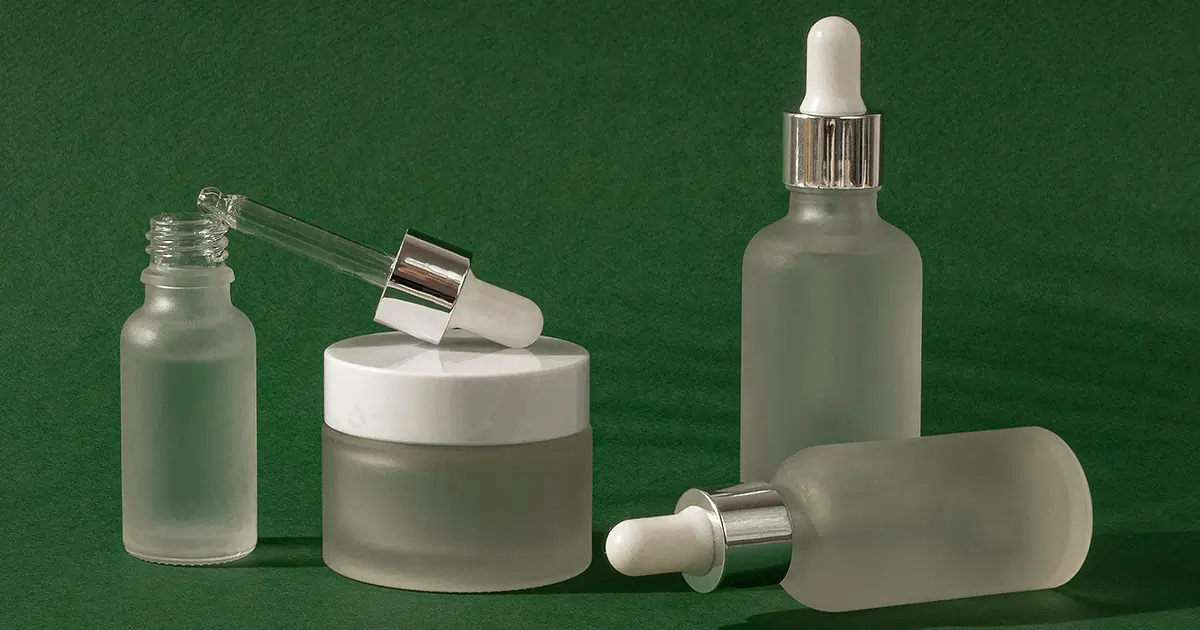
The best and easiest way to be relatable is to put the brand’s signature color (Every brand has its signature color. Mostly the color you see on their logo). If you look at big companies’ websites like Neutrogena’s you will see the products on their website are all in blue, black, white and yellow. That is their signature color.
Don't want to be so obvious? Okay. One more simple way is to stick with the basics. What basic? Of course, off-white or any similar soft and sober-toned color. It will blend easily with the skincare products theme. But if you want to have no background of images that looks like the product is floating on the air, simply just remove the background. By removing background, you will open many options for post image processing.
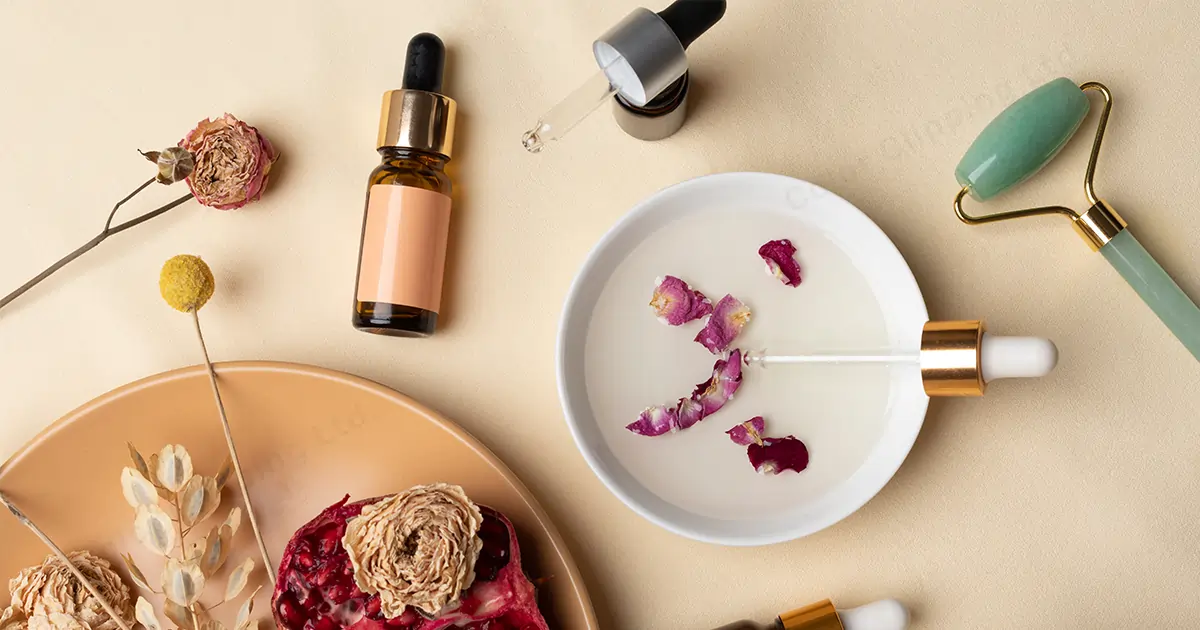
You can also try with some textured background. Suppose your brand claims to be environment friendly then you can choose earthly elements to create the background. Earthly elements like tree leaves, tree branches, wooden pieces, rocks, or even water. A shadow of the splash of water could also make a very amazing image…
Props are good to use. They add some character to the photo. It’s wise to use the ingredients that are in the skincare product that you are already working on. You can use fruits which the brands claim to add to their products. Like pineapple, avocado, lemon, coconut, kiwi, aloe vera, cucumber, banana etc.
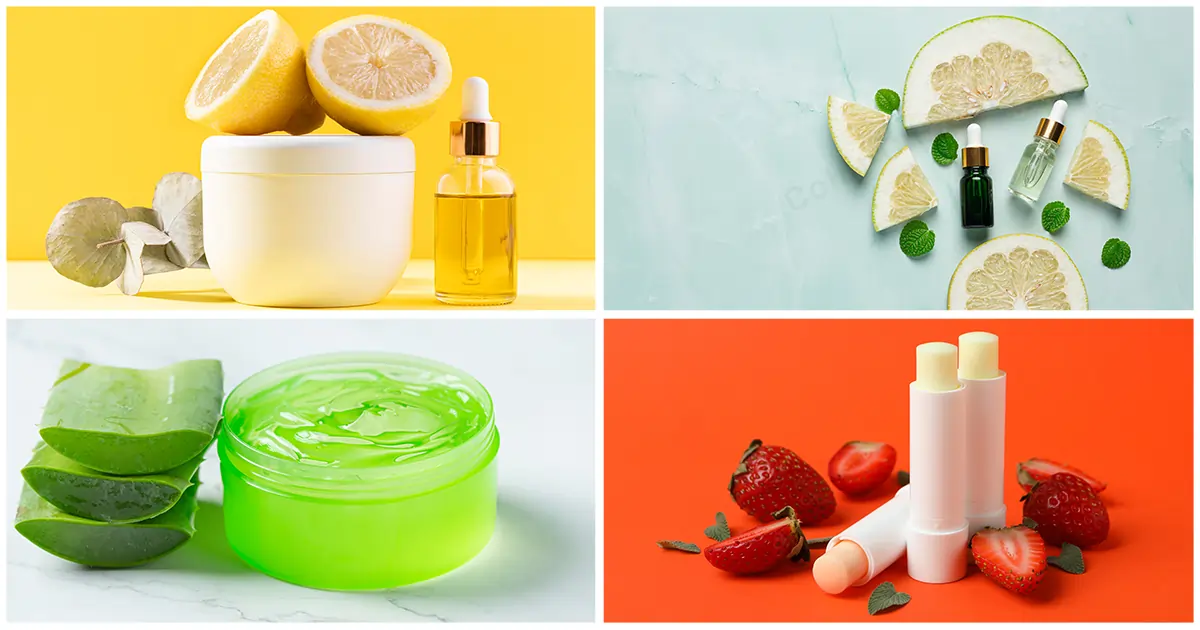
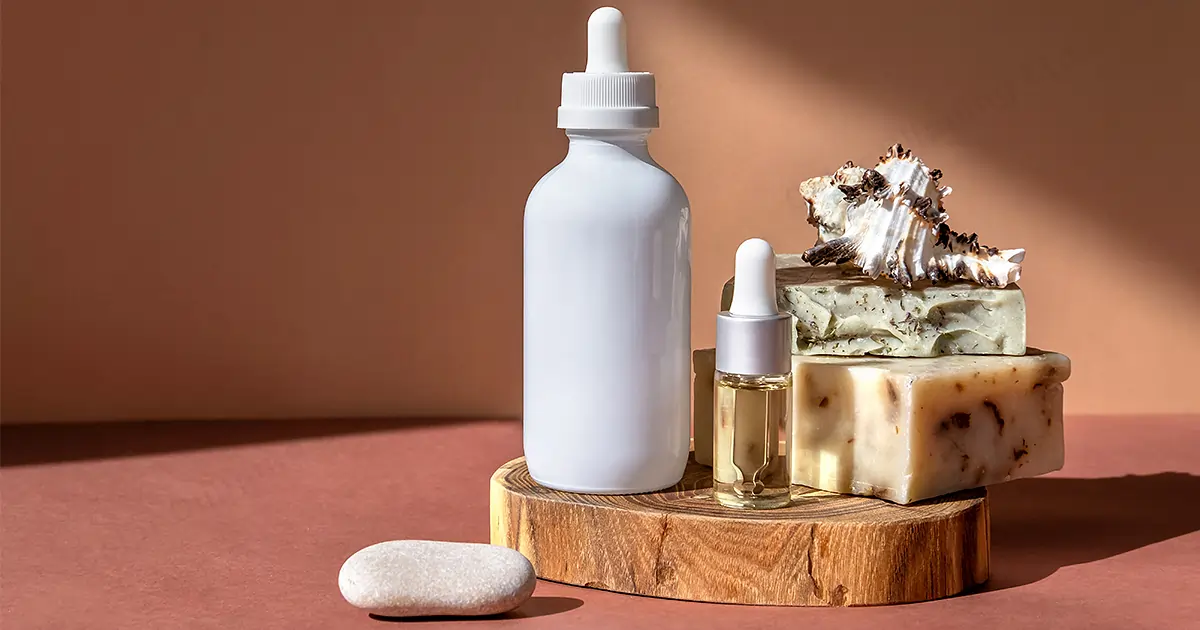
You can also use mirrors or balls or anything similar element and small props that are made for small-sized product photoshoots.
You can also use some clear water to give that fresh vibe to the picture. There are many ways to add water to a picture. And you can also experiment with water to see how the shoot and pictures go.
There are 3 common water methods that photographers usually do with water.
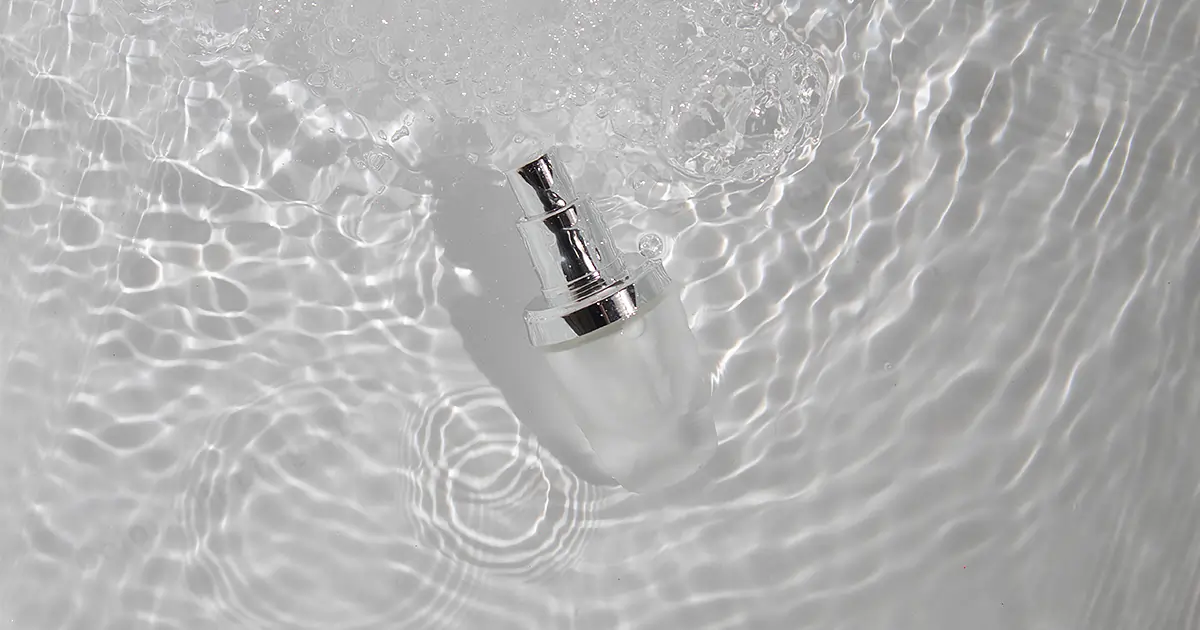
Go to the best-selling brand The Ordinary’s website. You will find the art of water photography and also will catch the freshness relevancy with the product when you dig on their website.
Not only the product, but the packaging can also bring authenticity to the picture. The packaging also carries the brand’s signature most of the time. If you want to focus on the brand and products only instead of ingredients then this will be best for you. Sometimes skincare products don’t have many natural or fruity ingredients in them. So, in those cases, it is best to avoid the ingredients and focus on the product itself, and to emphasize the picture you can add the packaging as well.
Look at Tatcha’s website. You will find their combo offer’s pictures are shot with the boxes or packages with what they come in.
It’s also a very common product photography technique to add to any product. You will find this technique very easily on any website. Common yet very catchy concept. A mirror reflects yourself. Be yourself is the motto of this kind of photo method. You have to place a mirror on the bottom (or on the side or in an angular position from where it will reflect to the camera directly or anywhere you prefer) of the products. And put whatever other products or props you want to add. It will create a great reflective shadow.
Since we are talking about skincare products here. Focus on the actual texture also. It can be a must to do the method. Since customers are also very concerned about their product before buying. Not everyone’s skin can capture everything. Skins can be very sensitive. Products that are great for oily skin might destroy someone’s dry skin. And the dry’s skin product might not suit oily skin. And most of the time the types vary on the product’s texture. If you research a bit, you will find oily-skinned customers will always look for lightweight products and dry-skinned customers will look for something with a thicker texture.

Even though most of the brands provide information prior to buying, still customers prefer to see or test by themselves. But not everyone will keep buying and spending money on testing products if they work for them or not. So, providing a swatch will help a customer to at least have an idea of whether the texture will suit them or not. Yet only texture can not define that. One should have proper knowledge about a product before putting them on their skin.
In Camera Settings, you have to keep in mind: Manual, Format, Aperture, ISO, Shutter, etc.You have to have a detailed idea about camera settings first. In short, you have to be very patient. Since you have to try out a lot of ideas and a lot of techniques. So, before that, you need mental preparation for that as well. Finally, you will have that soon.
You can try all the above techniques and see what works best for what. Gather some experience on it, so that later on you don’t have to waste time on trying stuff. You will know before working what will work and what won’t. E-commerce product photography needs time to have a grab on it.
Don’t try to use every method from above for one image. It will create a mess. Again, don’t use too many props for one image. It will distract the attention of the viewer. The main purpose of product photography is to attract viewers/clients to the products.
So, in the end, I will suggest you keep it as natural and simple as possible. Try to hold the attention to the product in as relevant a way as possible.

Hello, it's Anika, Content Executive from Color Clipping Ltd with a devotion to contributing my skills and knowledge more simply. Keep learning and growing with us.
Deowan Shimul
Since 2010, Deowan Shimul has been refining the art of jewelry retouching, combining precision with advanced technology. In 2017, he expanded his expertise into commercial product photography and now leads a team of 120 professionals. Together, they produce high-quality visual solutions that help brands grow, streamline workflows, and achieve real results for clients worldwide.

Chief Production Officer