Photo Editing

Are you a photographer who just started editing or are you already into editing but at an intermediate level struggling to do better in post-processing photography? Then I’m here for you. In today’s blog, we will learn about the basics of post-processing photography. And where to start from. But before moving into that you need to know what post-processing photography is and why it is important for us.
Photo post-processing photography is the manipulations that are done after clicking a raw picture, mostly for the purpose of Enhancing the picture. Post-processing photography actually indicates photo editing and photo retouching. If you are interested in photography post-production and all the related good stuff then you will need reliable software. There is a lot of software out there. But not all the software will work the same. I suggest you choose Adobe Photoshop and Adobe Illustrator for post-photo editing.
Now it has been quite obvious why photo post-processing is so important. Through image post-processing, you can attract your targeted audience. The attention of clients is undoubtedly unavoidable. If your work or photography is for business purposes, then you can’t ignore the editing necessity.
A very small and common example that I can provide is, that when you go shopping you might research on the product previously. After surfing hours on the net, you choose the store that seems to have more appealing products than others. Right? Then when you finally go to the store and buy the product. While exiting from the mall you might find the same category product in better quality at some other store. Why does that happen?
It was just because of the presentation of the product that attracted you. Did you wonder why some products of a store look more appealing than other stores online when in reality they both might be manufactured in the same way and the quality might also be the same? Yes, the answer is again photo editing.
So, does it mean product sellers do post-editing photos to trick the customers? Well, some might do, but I extremely discourage that for you. Because that can give you profit for a small time with a long-time loss. How? If you promise something that you don’t sell then customers will lose their trust in you and will not buy products from you again. So don’t play with their trust.
Now you might ask, “Then why the damn do we need photo editing?” You see, camera lenses these days are very high quality. They can pick the small details that are invisible to normal eyes. Especially in jewelry photography. Jewelry can have very small blemishes and dust that we are unable to see with our bare eyes. The cameras are not noobs like us. They pick every single spot and blemishes. That’s when photo editing comes in handy. You can easily remove the dust and blemishes from the jewel with the help of Photoshop and that will make the pictures look appealing to the clients.
So, now do you understand why post-editing photos are important for an honest business? Okay, good. Let’s move on.
Now that you know why editing product photos of your business is so important, let’s learn about the basics of post-processing photography. If you are a beginner hopefully my suggestion based on my personal experience will help you get from where to start the experience. So, let’s Go.
It’s always wise to shoot pictures in the RAW format. RAW format is important since with this format you can easily edit and save to any format you want. Moreover, Raw files are like Raw materials. You can mold them into any shape. The biggest flex of Raw files is that you can recover the highlights and shadows.
Do you believe that the picture can talk? Or the pictures can set your mood? NO? Suppose your day went very tiring and you had a lot of work. Or your day didn’t go so well, and now you are upset. You went to Facebook and scrolled the newsfeed. Then you saw some cute kitten and dog pictures. If you like dogs and kittens then of course you will instantly feel happy and joyous. That’s how a picture can set your mood.
Not only that, if you look at a picture that has a dark black sky inside a forest you will instantly feel creepy. The same goes for the opposite, like happy pictures. If you see a picture shot in bright daylight in a flower garden, the garden might have various colorful flowers then you will instantly feel happy. In short, pictures have the power to set our mood for the day. But you can manipulate that power and set a picture’s mood. How? Just by playing with the colors and tones of the picture.
Bright and beautiful not always but mostly comes together. Generally, brightness is a sign of positivity. In literature, you will see authors and poets describe nature in a bright color when the scenario is a positive scenario. Not only that they also put their characters into bright color dresses to draw positive characteristics. Cinemas also do the same. Actors and actresses are dressed according to their characters. You will mostly see a positive character in a very bright color. That’s the reason why our mind is set to be happy or feel positive when it sees something bright.
So, if you want a picture to give positive vibes to the viewers then the easiest way is to manipulate its color and make it bright. Then again, how bright is too bright? You see, dragging someone’s emotions through a picture is not a piece of cake. That’s why people say photography and photo editing are arts. Not everyone is a master of the art.

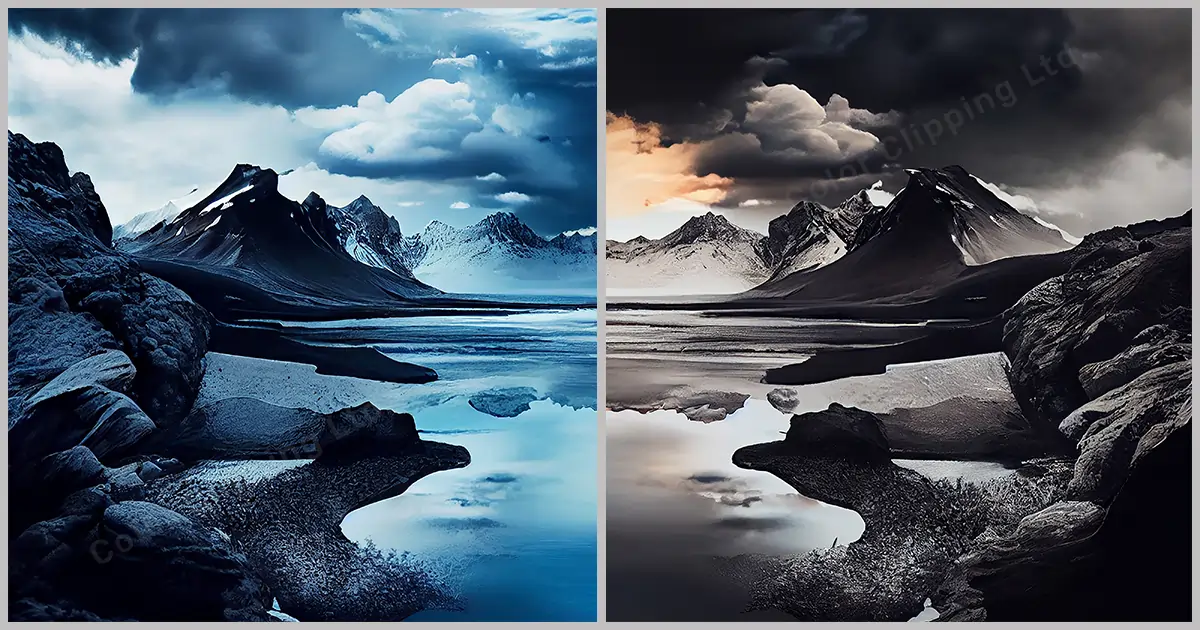
Look at this image. It has bright sunlight and very beautiful sunlight coming into the scene. That gives a positive vibe. You instantly feel happiness and calmness from the picture.
What if this same picture can chill your bones? What if I say they are able to creep you out with just a little bit of editing and manipulating the picture’s colors and tones? Just tone down the exposure. Sounds hard? There are many ways to do it. Because post-processing photography has endless options.
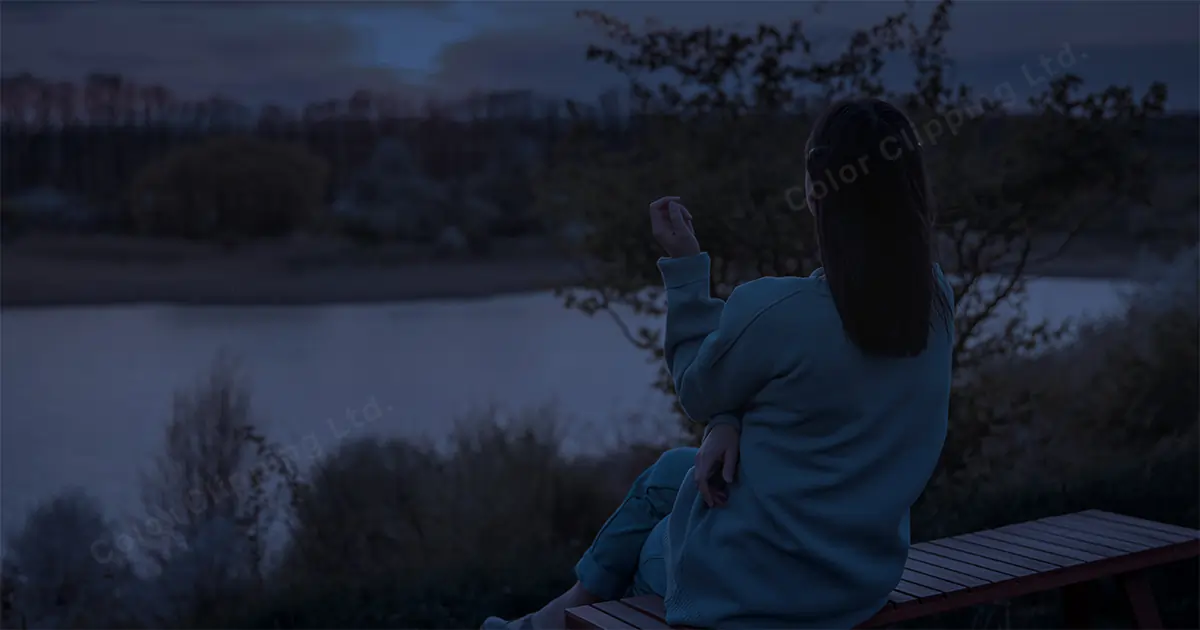
See. The picture is now not giving much positive vibe. How to do it? Go to the bottom of the layers panel and select the adjustment icon. Now select the color lookup. The properties panel will pop up. Now click on the 3DLUT Files option and there you will have many options to manipulate your image. Check what preset works best for you.
And there you have it. Manipulating the time of the day and as well as the vibe of the image.
There are colors in every picture. Yes, in every picture. Even in black and white pictures. You might think I’ve gone mad. But hear me out first. If you work in Photoshop, you will know that you can mess with 3 things. Highlights, Shadow, and Mid tones. Let’s understand those a little bit more.
Highlights and exposures are the same. If you want to bring up the highlights you just need to turn up the exposure. And it will Brighten up the highlights of your Picture. But you need to be very careful while fixing the exposure and shadows. Since too much exposure and shadows can make the picture look unrealistic.
If any area is under-exposed then bring up the highlights. And if an area is over-exposed then bring up the shadow. Through this, your image will grab a perfect blend of colors. And these small color corrections will make the picture look more attractive.
Did you notice the model and actor/actress’s photos? How flawless they look! They look like angels. Ever wonder what they eat? What do they use on their skin? What skin magic do they do to look this perfect? Let me tell you the secret. Most of the time it is Photoshop.
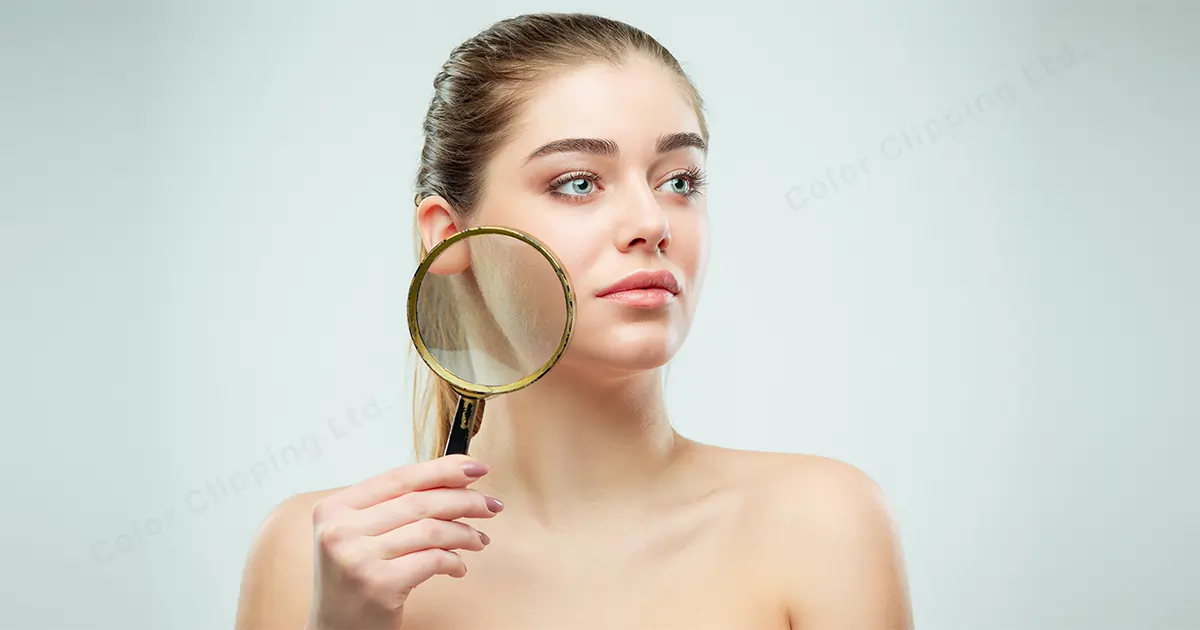
Firstly, you should not compare yourself with models or actresses, since they are mostly eating, exercising, and taking care of themselves in a very strict manner because it’s their job. After that when you see them on the screen their makeup and hair are done by professionals who spend hours on one model/actress to make them look perfect. Even if that’s not enough they took the help of Photoshop to fix their makeup and skin blemishes. After the Photoshop their skin looks so perfect and not only that. It is also possible to fix your hair with the help of photo editing software.
So, if you are really into photo post-production, this skill is a must-have. Learn image masking and the Brush tool as well. Since these two tools are heavily effective in fixing makeup and hair.
If it’s necessary then don’t hesitate to crop or cut your photos. Get out the unwanted parts of the picture. Also, you may rotate if the picture is not straight. These basic editing can be done with the help of any editing tools. Some cameras and phones have this editing built into their settings.
Also, one of the easiest and simplest edits that you must learn is a clipping path. Clipping path comes in handy for many edits. It helps to outdraw an object which might be useful for removing an unwanted object from the picture. or removing the background from the picture.
It’s very important to feel good or feel satisfied after you edit an image. If you don’t like the image that you edit then it might not be praised by others as well. Do the best you can do in a photo. If you don’t like it, start over. If you still don’t like it then put it on a side for a day and do that image again the next day. Finally, when you feel like the image is perfectly done only then leave the image.
Of course, there are a lot of software out there. How to know which one to use for editing? It actually depends on you. The leading post-processing software are Adobe Photoshop, Adobe Lightroom, Gimp, PaintShop Pro, Adobe Illustrator, etc. They all have their own specialty when it comes to post-processing photography. But I prefer Adobe Photoshop the most. The biggest reason is that you can do almost any editing that you want with this software. But for color exposure and color corrections, I also use Adobe Lightroom. You can also try these two software to explore the post-processing photo world.
Lastly, whatever you do, do not overdo anything. Post-processing photos is an art. And if you consider yourself an artist then you have to learn the skills of making the picture as realistic as possible. Of course, there will be mistakes. If you don’t make any mistakes then probably you are not learning anything. So, do experiments, explore the endless possibilities that are available out there. As long as you are practicing, and making mistakes, you are learning.

Hello, it's Anika, Content Executive from Color Clipping Ltd with a devotion to contributing my skills and knowledge more simply. Keep learning and growing with us.
Deowan Shimul
Since 2010, Deowan Shimul has been refining the art of jewelry retouching, combining precision with advanced technology. In 2017, he expanded his expertise into commercial product photography and now leads a team of 120 professionals. Together, they produce high-quality visual solutions that help brands grow, streamline workflows, and achieve real results for clients worldwide.

Chief Production Officer