Hello, Photo Enhancers. We all have been there, looking at an image wondering, ‘How do they edit that? For those images which look as realistic as they could, the picture captures some features which are not possible to have the way it shows, in real life. Most of the time that is possible with the help of Image Masking. Now, what is Image Masking?
What is Image Masking?
Image Masking is the process through which graphics software like Photoshop hides some portions and reveals some portions of an image. Just like putting a patterned or designed mask on an image.
Have you ever done glass painting or see-through jar painting? In jar paintings, you put paint on some parts and leave other parts. Some parts show the amazing colors that you tried to showcase on the glass. And some parts peek through the glass. Photo Masking is just like that.
Masking photos is one of the finest techniques in Photoshop. But there are a few types of picture masking.
What is Masking used for in photo Editing
There are many options that you can go for via image masking. Let’s see some common uses of Masking.
- Background Removal - There are so many methods and techniques to remove the background in a photo using Photoshop, Lightroom and other software. Masking is also one of them. Masking makes the process way easier. We will talk about the process later on.
- Alter Portions of an Image - Suppose there are a few areas in such shape that you don’t want them in that shape to be altered. Like profile photos. The Photo you have might be in square shape. But you want them in a circle. You can edit them with the masking method.
- Blending Multiple images - You went on a vacation and enjoyed it a lot. You took some beautiful pictures but when you came back from the trip you realize the pictures are not perfect. Some have beautiful skies; some have good beaches and some have good background views. You want only one perfect picture. You can use masking in this case to blend multiple images into one picture to make a perfect-looking picture. Take the beautiful sky from one picture, and take the view from the other pictures. And use masking to blend them into one picture.
- Define an image into a shape - Just like altering a portion of an image by masking, defining an image into a shape is almost the same work, just a different concept. Through any shape, you can do Image masking. Especially with the help of the Vector masking Image method.
- Hide or reveal any portion - Through masking you can always hide and reveal any portion of an image. By creating layers and using the brush tool. That’s all you need. Through these two tools, you can hide or reveal any portion of the image. It will work similarly when you remove the background of an image with the help of Masking.
- Making a collage image - when you want to collage an image smoothly (You can also do it roughly if that is your intention) with the help of masking pictures.
Software to use for Masking Image
Do you like coffee? No, I’m not asking for a date. There are plenty of Coffee Shops to hang out and get coffee. But not all of them will fulfill your expectations. Not for all you will save your money and wait for days to finally manage your time to meet your busy friends there. Not all the cafés will give you aesthetic vibes like Starbucks, and not all the cafés will make you feel rich as the Costa Coffee will and not all the cafés will bring the soothing classy taste of coffee as Gloria Jean's will.
The moral of the story, you will find various software with masking facilities but the quality or usability will not be the same. So, to get the best result of Masking, go for…
- Adobe Photoshop
- Adobe Lightroom
- Adobe Illustrator
Types of Images Masking in Photoshop
There is not one type of Image Masking. There are quite a few types of Image Masking. Let’s start with Adobe Photoshop.
- Layer Masking
- Clipping Mask
- Alpha Channel Masking
- Vector Masking
- Gradient masking
Let’s Learn to earn. (Cash or knowledge whatever you want to earn)
Since this blog will be a massive one (be alert), let’s divide it into 3 parts.
Part 1 : Masking an Image in Adobe Photoshop
Photoshop is like Coca-Cola in the Editing world. Affordable with Quality. That’s why most of the drinkers, uppss! Sorry, Editors prefer Adobe Photoshop more than any other software.
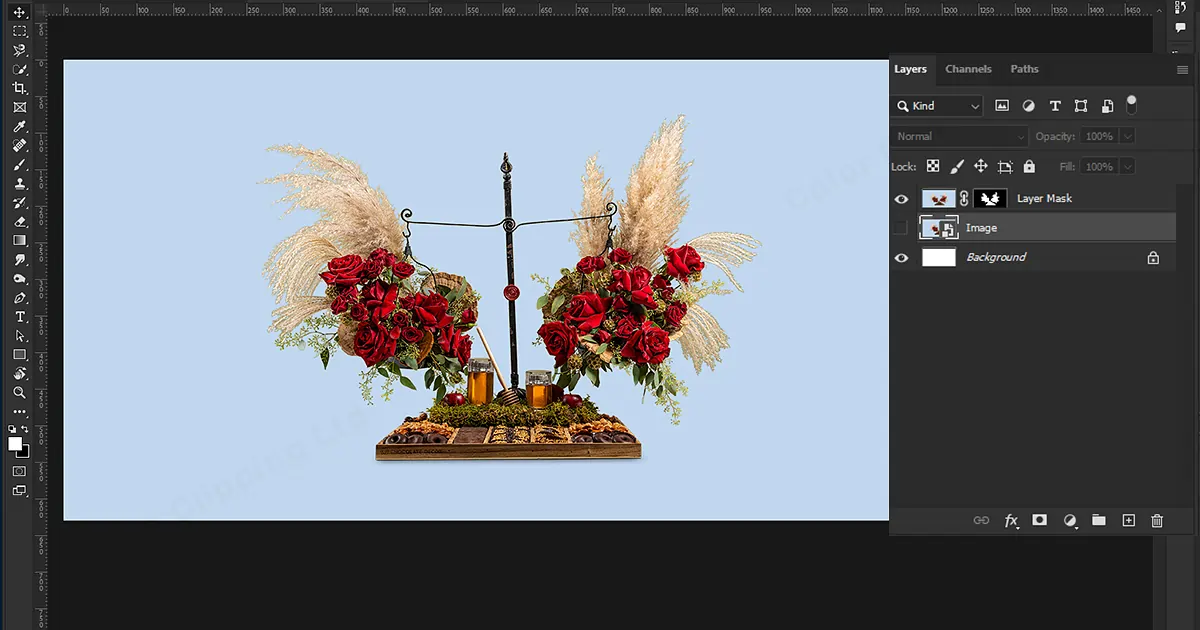
Layer Masking in Photoshop
The Layer Mask is mostly used in places where you need an eraser. Because Layer Masking is better than the eraser. And the reason is that the eraser erases but the Layer Mask hides. With the eraser, you can erase something which you can’t bring back after a saving, if you want but with Layer Mask, you can keep the parts you’re hiding and use or edit it afterward.
You will find the Layer Mask on the Layer Panel. On the bottom, there will be an icon similar to a camera. If you put your cursor over the icon, it will show the name “add layer mask”.
Process:
- Click on the “add layer mask” and you will have another thumbnail on the right side, on the same panel.
- Think of the new thumbnail as a piece of cloth. When the thumbnail is white that means no cloth over the picture. When it’s black then the cloth is over the picture. Before starting the editing make sure the thumbnail is in white.
- Go to the left side’s toolbar and change the color from the last third option. Change/adjust the size of the brush. You will find the brush size and brush hardness in the top left corner of the top toolbar.
- Draw around the parts you want to show. Draw over the parts you don’t want to show.
- You can also take an object selection. Put the object’s shape (like a circle, or square) over the picture and Photoshop will trace that mask automatically. You can also retouch or define the edges with the help of the brush tool.
Note: There are not only white and black but gray colors. The gray indicates transparency. If you apply gray color then the layer underneath will be transparent. You can also add a gradient while still being in the mask.
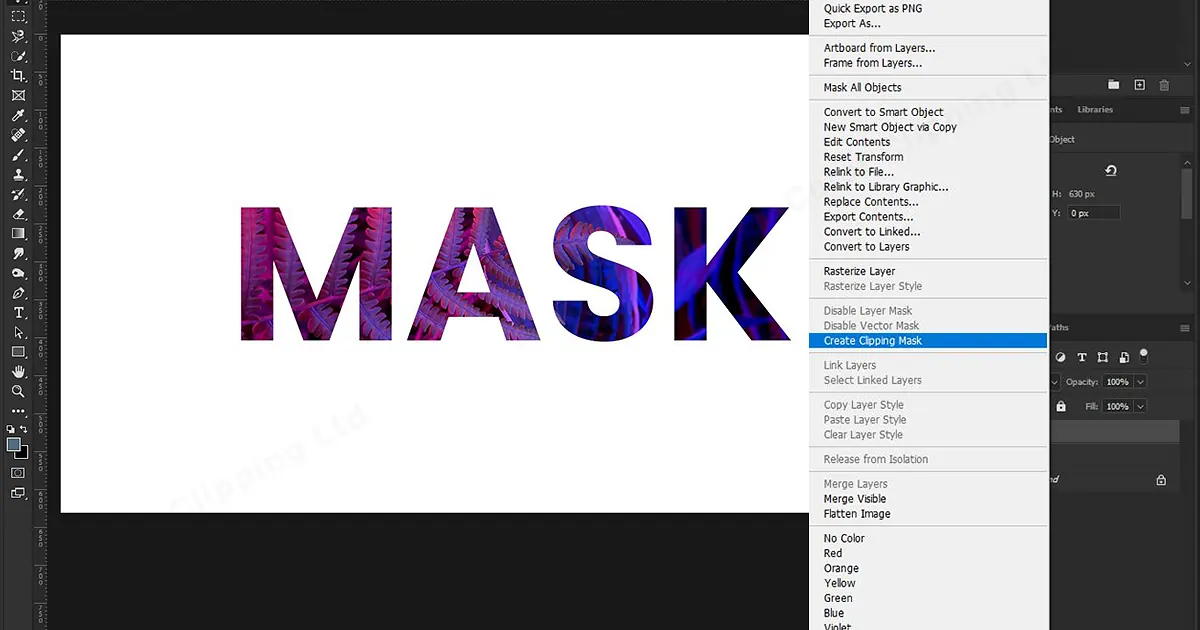
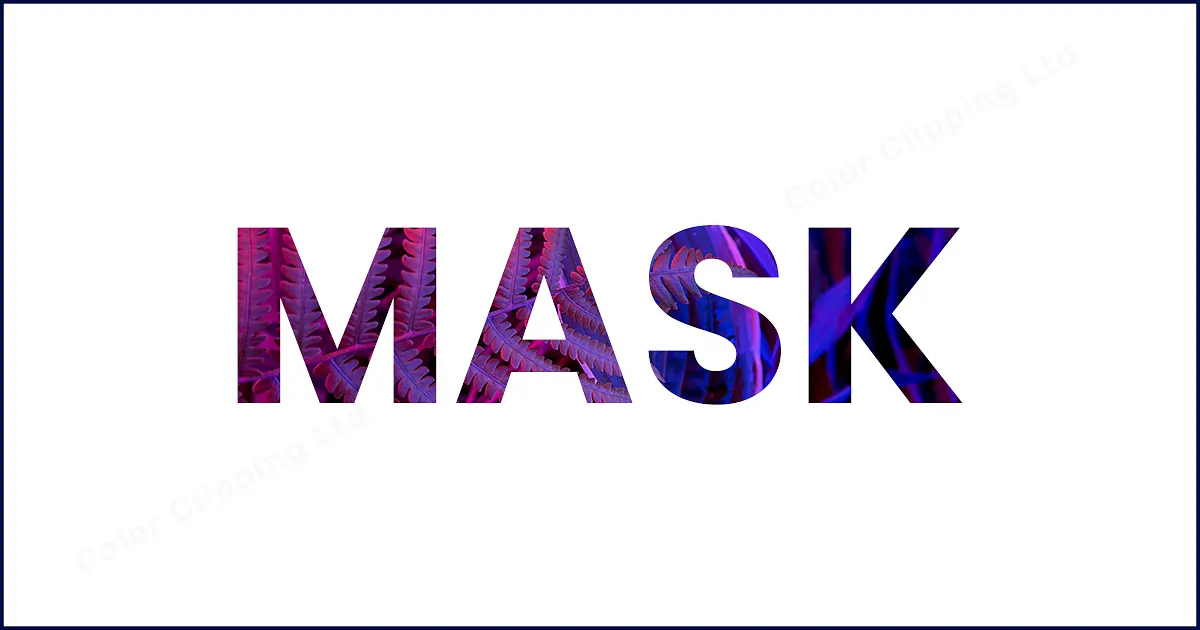
Clipping Mask in Photoshop
A Clipping Mask can make your picture look more attractive. Through this, you can create a shape or text and trace your image within the parameter of the shape.
How to use Clipping Mask in Photoshop
- Create a layer with some texts (try to avoid your ex’s name). or you can also add some shapes (don’t use your crush’s shape while singing I’m in love with the shape of you). If you are using text, try to use a thick font. So that whatever you put underneath will peak through the texts clearly.
- Open images/shapes that you want to show through those letters.
- If you want a smaller portion of an image to peak underneath then, copy the part of the image that you want there and paste it while the text/shape layer is selected. You will see the image has been pasted in a different layer.
- Now you have to combine and clip. Clip Mask the image layer and texts/shapes layer. Don’t know how to do that? Easy!
Press Alt and place your cursor in the middle of two layers (Image layer and Tests/shapes). You will see the cursor changing icon. Click.
- Ta-da. Magic. Your Clipping Mask is ready.
Not only that here you can resize pictures, create shadows and many more. Congratulations, you have learned a new ninja technique today.
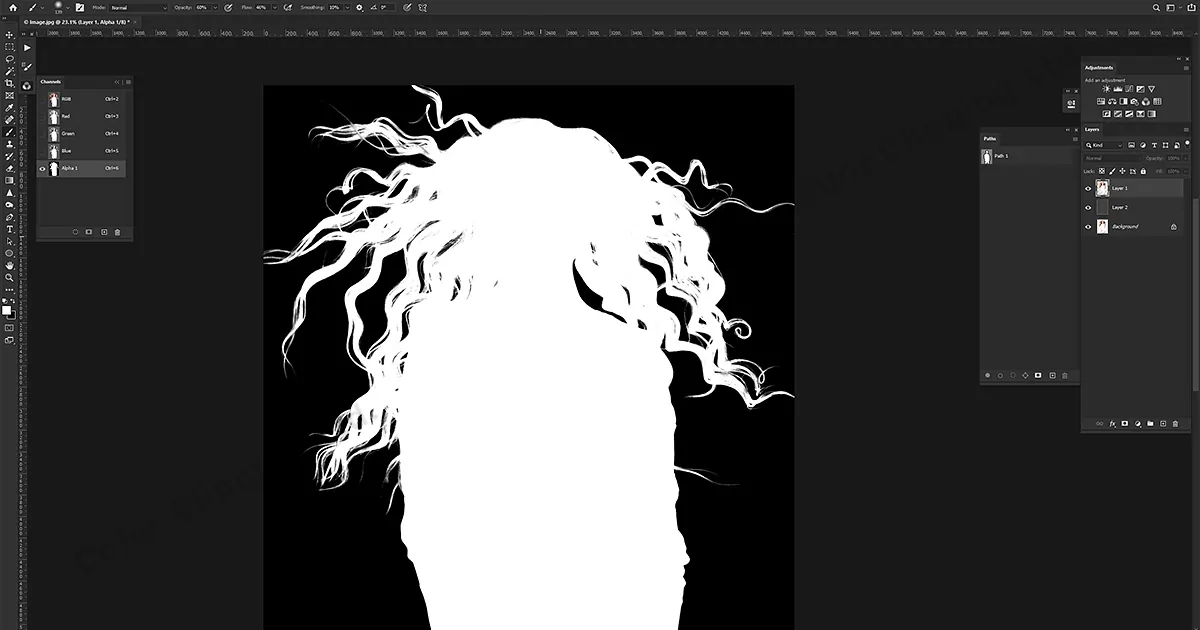
Alpha Channel Masking in Photoshop
Who gets extra time these days? We all want work to be easy. And why not! If you can spend 5 mins on a work and have the same result as 1h long work then why to spend more? Alpha Clipping Mask does the exact same thing. It helps you in fur, hairy and feather-included pictures. It selects feather-like objects easily. So, you can finish your work fast and spend your rest time working on other projects or spend it with your family and friends. (Don’t spend your valuable time by completing watching a whole series on Netflix in one night)
How to use Alpha Channel Mask in Photoshop
- Open the image in Photoshop. And let’s play with the colors.
- Go to the channel. You will have the channel’s panel right beside the layer panel.
- In channels there are RGB, Red, Green, and Blue. Click on the panels and you will see the images are all in black and white except RGB.
- Among Red, Blue, and Green select the one which has the most color contrast.
- Make a copy of that by simply dragging the thumbnail on the new channel icon (just on the right of the masking icon). And you will have a new icon.
- Now you should work on the copied channel. If you directly edit on any other channel rather than copied ones, your images will be affected.
- Now while being in the copied panel go to the adjustments and select levels. (If you can’t find it then go to the image menu and select adjustments). You can even press Ctrl+L
- On the panel you will find arrows at the bottom of input levels. Now Drag them and adjust them to make them as black and white as possible. The color contrast should be very clear and no space or gray color should be seen.
- Now hold Ctrl and click on the thumbnail to select. Go to the layer panel and click on the add image masking icon. And you will see that the image has been masked. But if you want the opposite, the part that you want to keep and the part that is visible you want to make it vanish then simply press Ctrl+I.
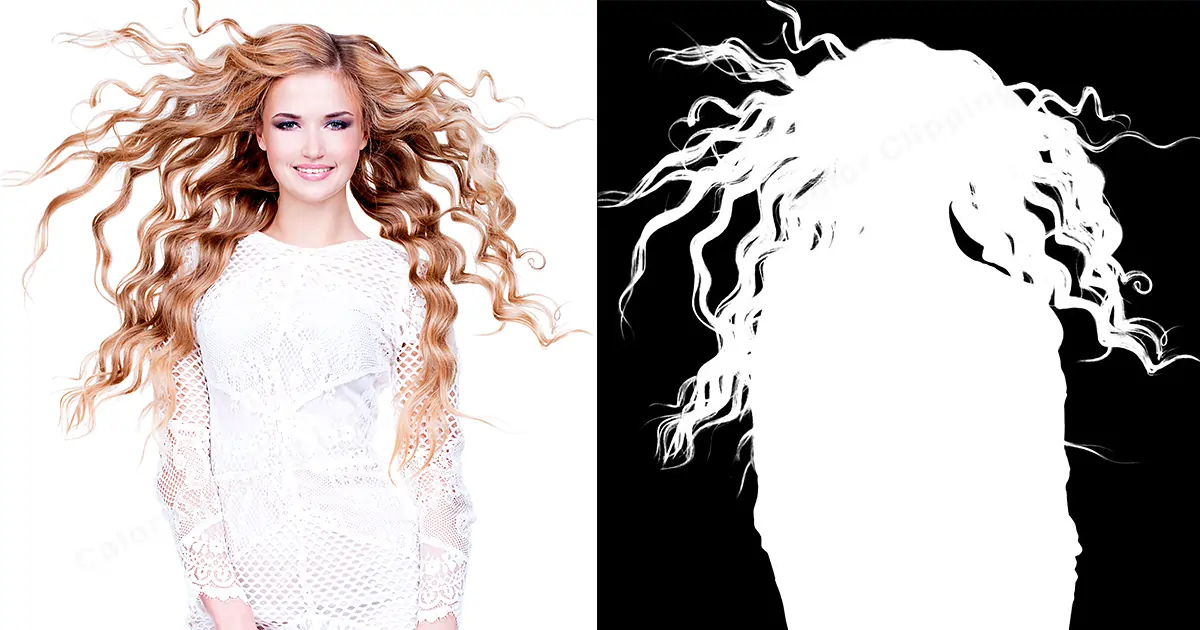
There you have it. Smooth clear picture. Now you can go and take your pictures with wavy hair on your roof and edit it to a mountain view. Looking like you're on a happy vacation.
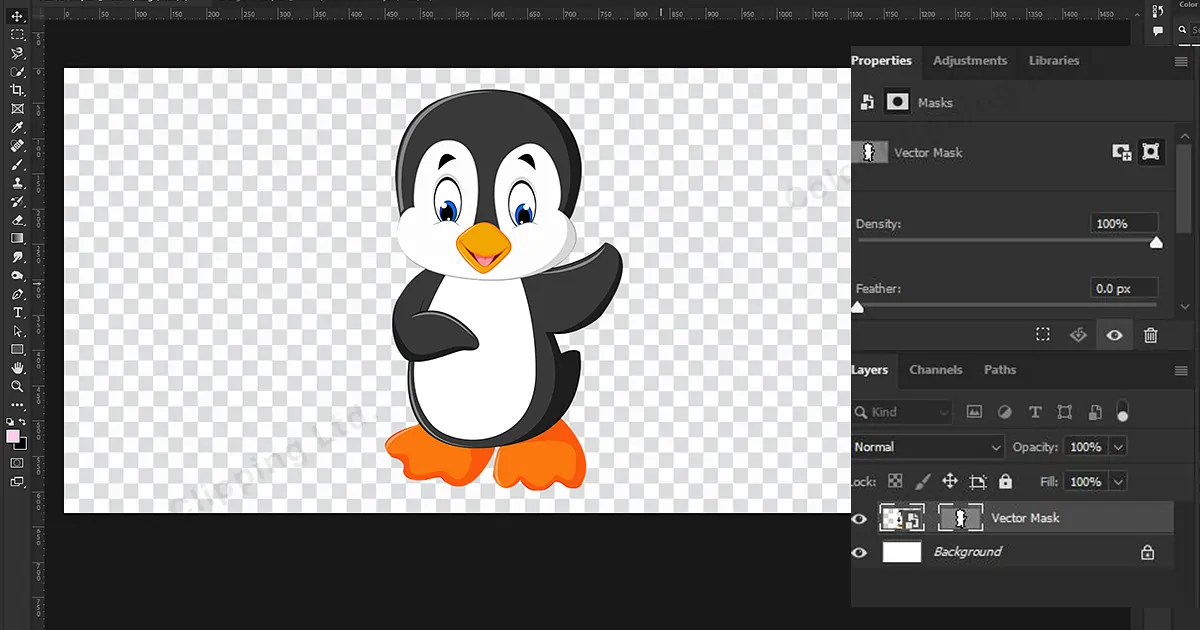
Vector Masking in Photoshop
Layer Mask and Vector Mask might seem almost the same and they both will give you almost the same results but still, there are a few differences between Layer Mask and Vector Mask.
Even though, by the end result you will find it hard to recognize which one is Layer Masked and which one is Vector Masked, there are differences in work methods. A Vector Mask is way more preferred than a Layer Mask. For a few reasons.
How to use Vector Mask
Hold on tight,
this is going to be a little longer ride…
Again, in this method, you can use texts, shapes, and second images as well. For easier learning let’s take a picture of a man dancing all in black shadow and you want to add texts which will give you the look that the text is behind the man. How will you do that? Well, there are tons of ways but let’s learn this on vector masks…
- Open the image in Photoshop
- Take the text layer over the image layer.
- Drag down the opacity level to the point where you can see through your texts. You will find the opacity option on the layer panel.
- Vector mask is the masking where you can select text or object very precisely with the help of a pen tool. Select the image layer, select or out-trace the man dancing on the floor. You can use plenty of things. The easiest way is quick selection.
- Select quick selection and inverse the selection. Do a right-click and select the inverse.
- Select the text panel and select the mask icon (add layer mask)
- Turn up the opacity to 100 (if you want to)
There you have it.
Now you can totally stop right there and have ice cream. Don’t like ice-cream? Then have coffee, tea, green tea, cheesecake, or whatever your taste buds prefer.
Happy now? We are not done yet. Don’t go! Let’s know something more.
This was easy. Since the guy is all in black. But if you work in more critical photos and areas then this might not work. Then the quick selection tool might not work 100%.
What will you do now? You’re going to read the next part. Duh!!
- Select the pen tool and don’t forget to change the option to “path” from “shape”.
- Start selecting the object/ trace out the object manually with the help of your mouse and hands.
- If you are using the same or similar image then it would be better to focus on the texts for selection. Trace carefully the places where the man figure and texts are joining, and out border the text. You have to be very careful and precious at this point. You will select the paths while being on the text layer
- Select the path selection tool. (If you have more than one path) You will find the path selection tool on the left toolbar.
- Now simply right-click and select the vector mask. Or you can also press Ctrl and click on the “add layer mask”. You will have a vector mask.
This is also a way to mask. Pretty good right? Don’t go for a break. Wait for something more.
- Where you have to do a very precious path go for vector selection and where you want to have a more feather-like finish you can go for layer mask or Alpha Channel Mask.
speaking of precious work. If you think you need more precious lines at this point, again go to the path selection and select direct selection tools.
- Now you can select any anchor point and move only that specific area. Select and do it over again until you find the perfect one.
Done! Now you can have peace of mind and relax for some time. Chill…
Done relaxing? Sure? Okay. Let’s move forward…
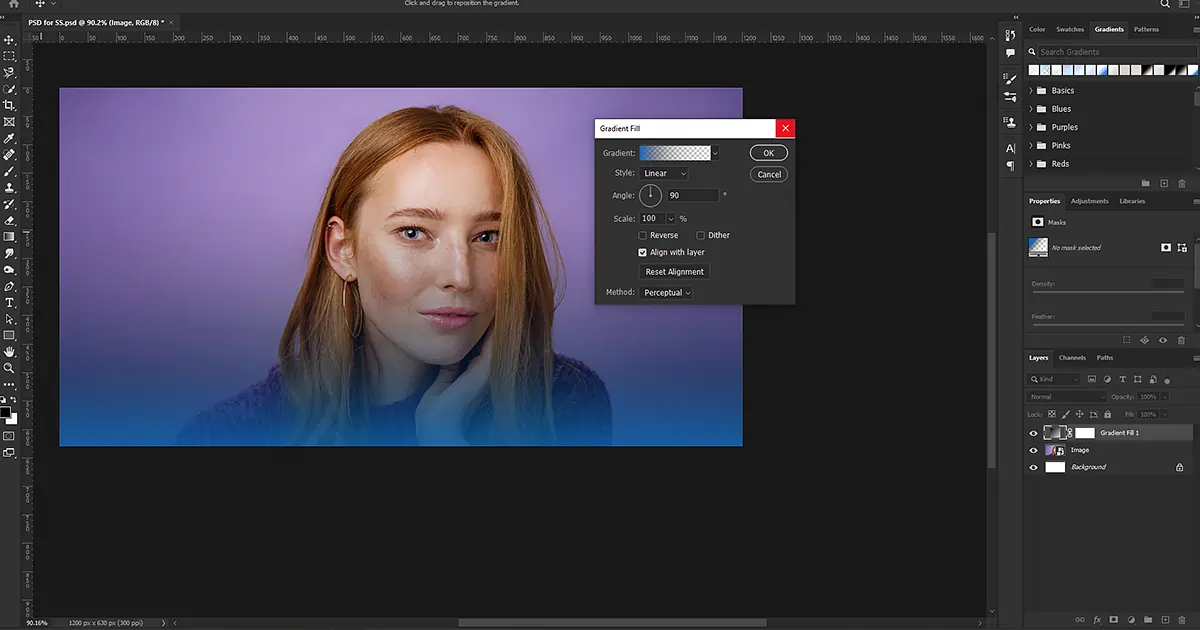
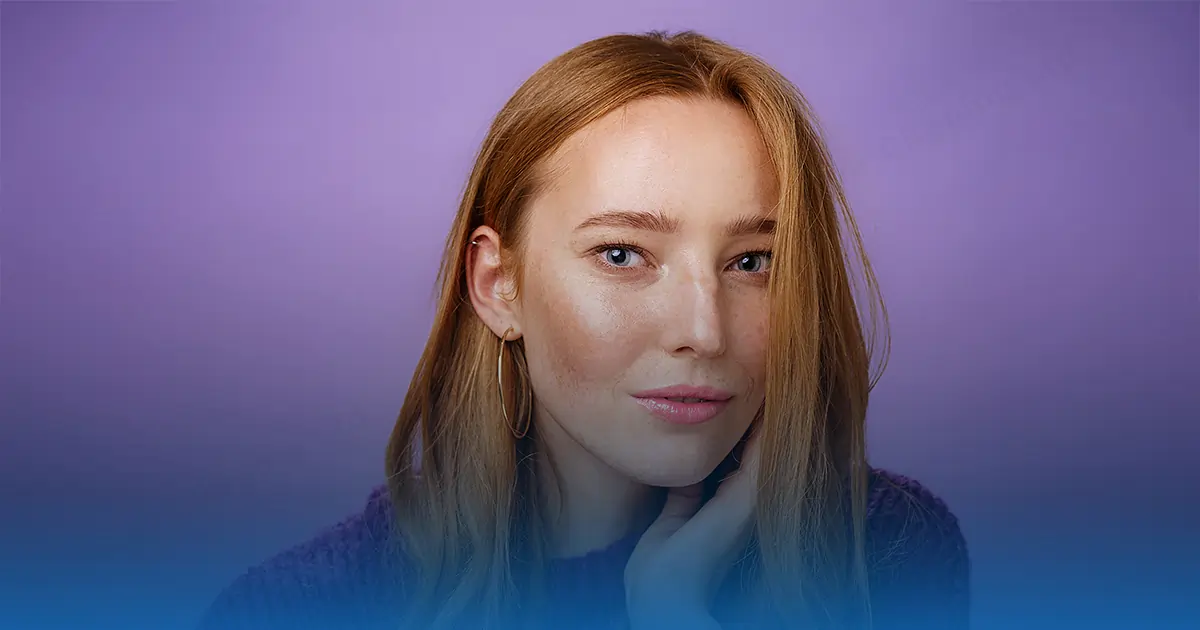
Gradient Masking
So far gradient is the simplest and easiest masking on Photoshop
How to use a Gradient mask
- Open image in the Photoshop
- Create a new solid color. (Could be in any color). The new solid color option is on the left side of the “add layer mask”.
- Now click over the layer mask. Select the gradient option. Select the black-and-white gradient transaction.
- Select the pattern you want. And click and drag over the picture where you want to have that gradient.
Done… enjoy your result.
I know it’s been a long day. Take a break. Star mark or bookmark this page. See you after dinner…
Done with dinner? Okay, let’s start our second part.
Part 2 : Masking Images with Lightroom
Lightroom is like the younger brother of Photoshop. You can do almost anything with Lightroom that you do with Photoshop. But there are pros and cons. Lightroom is believed to be better at color grading than Photoshop.
Like Photoshop, Lightroom also has varieties of Masking methods. Let’s see them…
- Adjustment Brush Mask
- Linear Gradient Mask
- Radial Gradient Mask
- Range Mask
- Auto Mask
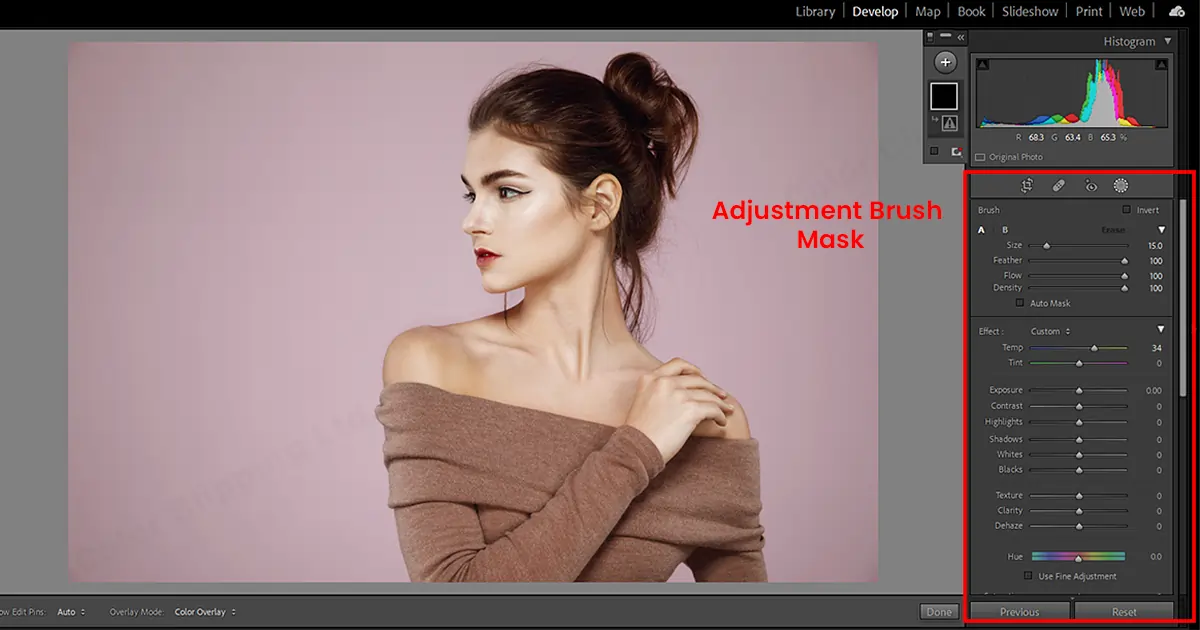
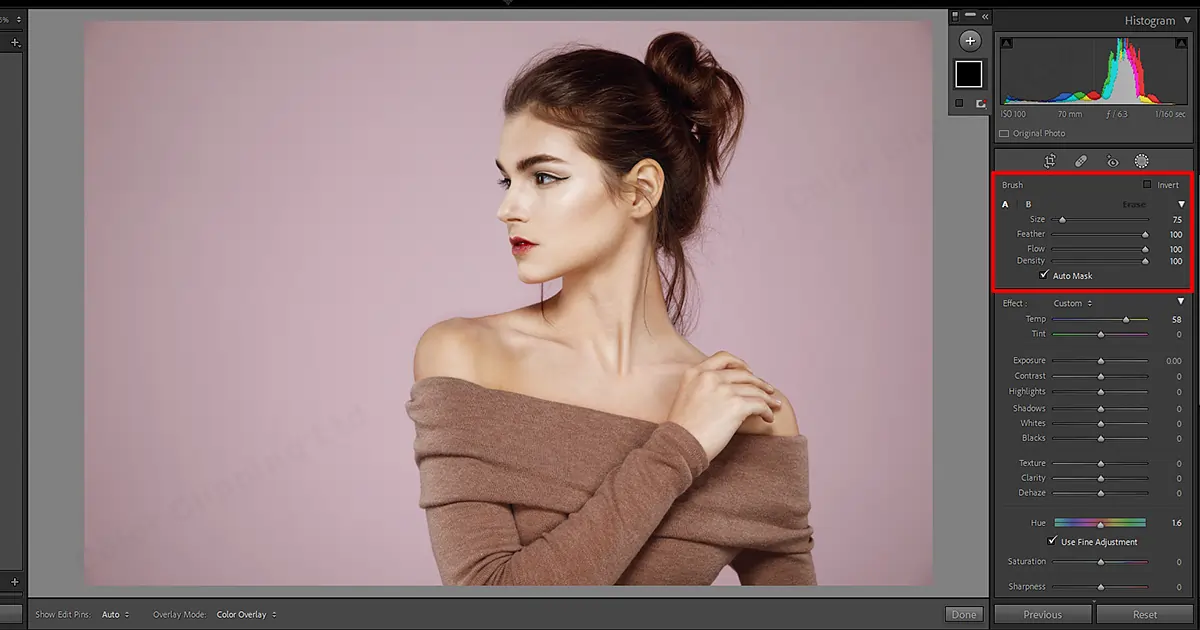
Adjustment Brush Masking in Lightroom:
The Adjustment Brush Tool is like a “Painting Brush”. You can adjust the exposure, clarity, brightness, and another adjustment through this.
How to use Adjustment Brush Tool in Lightroom
We can do a lot in Lightroom. But let’s stick to skin retouching/model’s face retouching
- Open the image in Lightroom and go to select “Develop” (you will find Develop on the top toolbar right corner)
- Press the ‘K’ key and change the effects to soften the skin.
- Start with a person that already has almost clear and perfect skin. It will be good for beginners.
- Since we will do skin retouching, lowering the sharpness will make the skin look smooth.
- Resize the brush and add a lot of feathers to it. Set the flow accuracy, according to the picture, and go through the places where the model/Skin has some texture. Even it out and make it smooth. But still, be careful not to overdo it. And avoid retouching around eyelashes and eyes.
There you have it.
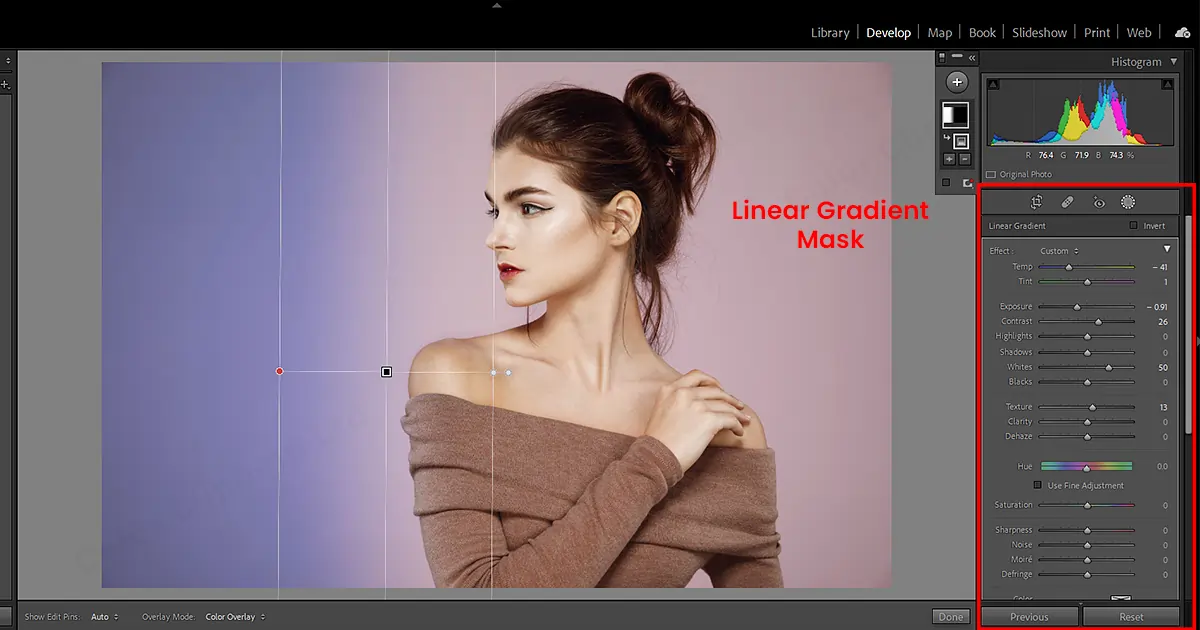
Linear Gradient Masking in Lightroom
A linear gradient is useful in color contrast and nature pictures.
How to use Linear Gradient in Lightroom
- Open the image in Adobe Lightroom.
- Go to a “linear gradient”. Click on the picture, where you want to have the gradient.
- You will see a center point of the gradient line. You can drag to make the gradient move up and down. You can also rotate the center to 360°. So that you can put your gradient anywhere you want.
- Now adjust the exposure, contrast, highlights, shadows, etc.
- If you have any extra object on the way which is getting affected, you can erase the effects on that particular area also.
- On the eraser option, you can also adjust the size, feather, flow, density, etc. Choose the options according to your preference.
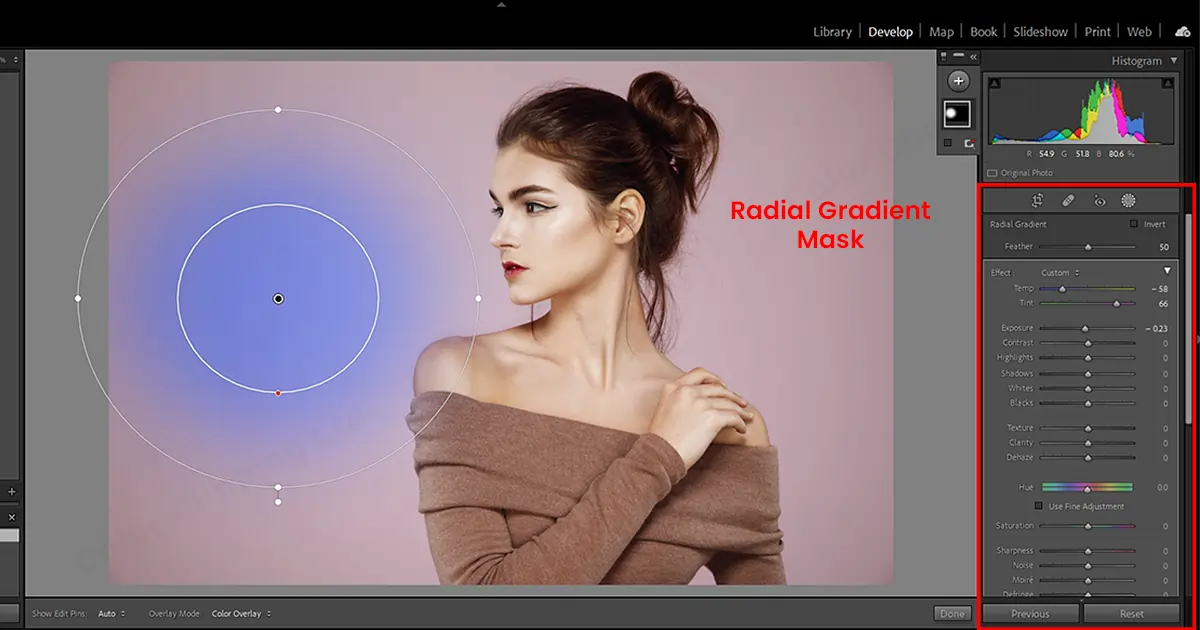
Radial Gradient Masking in Lightroom
If you are looking for more realistic photo editing, this technique is for you. You might have seen some amazing posters of movies and paintings. Where the picture looks natural but it also innocently focuses on one subject. Probably the protagonist of the story or title. That happens with the help of a Radial Gradient. Let’s learn how to do that.
How to use Radial Masking in Lightroom
- Open the image on Lightroom software.
- Go to presets just to add a little bit of color
- Go to the right side tab key, and select the Radial filter tool.
- Adjust the shape of the circle (The Radial Filter) and put it where you want the filter. (If you click on the Show Selected Mask Overlap box, you will see where the filter is)
- Adjust feather, color, exposure, brightness, and other adjustments that you want for the image…
- Remember, “Invert Box” will determine where the focus will be.
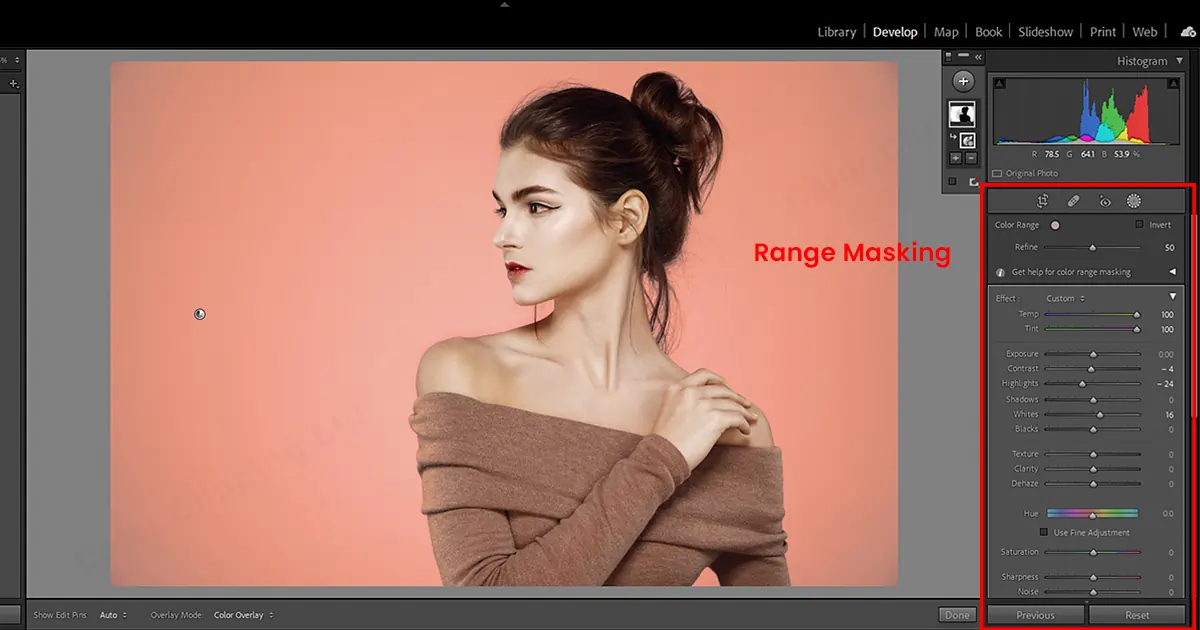
Range Masking in Lightroom
Range mask is mostly used for color correction on some specific area. Suppose you have a picture of the mountains and waters looking amazing but you know this picture could have been more. So, you decided to edit some specific areas to bring up the life in the picture. Let’s learn how you can do that…
How to use Range Masking in Lightroom
- Open your image on Adobe Lightroom Software
- Go to the mask panel and see some cool preset masks. Radial mask, square, etc.
- Choose your preferred shape.
- Now go to the bottom of the mask panel and you will see the “Range Mask” option.
- Choose Luminance.
Auto Masking in Lightroom
Auto mask is an amazing feature for selecting one part or an object in a photo to edit like color adjust without touching other parts in the photo. In Lightroom, if you look at the right (in Develop section) side of the panel, you will see Adjustment Brush, Radial Filter, and Graduated Filter just above the Basics panel. The Auto Mask works the same on these three features.
How to use Auto Mask in Lightroom
- Open an image on Lightroom Software.
- Take any feature, for demonstrating take the graduated filter for now.
- Change the color contrast, saturation, highlights, shadows, and whatever you want to change or adjust in the photo.
- Now click on the picture and drag. You will see a red filter halfway through the picture. The red filtered areas are where the adjustments are going to show up.
- But this way the filter will be applied to the whole picture instead of just an object.
- Click on the brush tool. It will bring up the panel of adjustments. With the help of the brush, you can add more to the adjustments or remove them from the adjustments.
- Click on the erase and click on the Auto Mask option then erase the part you don’t want. The software will do the rest for you.
Part 3: Masking Pictures in Adobe Illustrator
So, how did your day go? Helpful? If yes, I’m glad. If not, may I ask if the reason is you want to learn the masking through Illustrator instead of Photoshop and Lightroom? Don’t worry. I still got your back. Let’s learn Image Masking through Adobe Illustrator.
You will find 3 types of Masking in Adobe Illustrator
- Draw Inside
- Clipping Mask
- Opacity mask
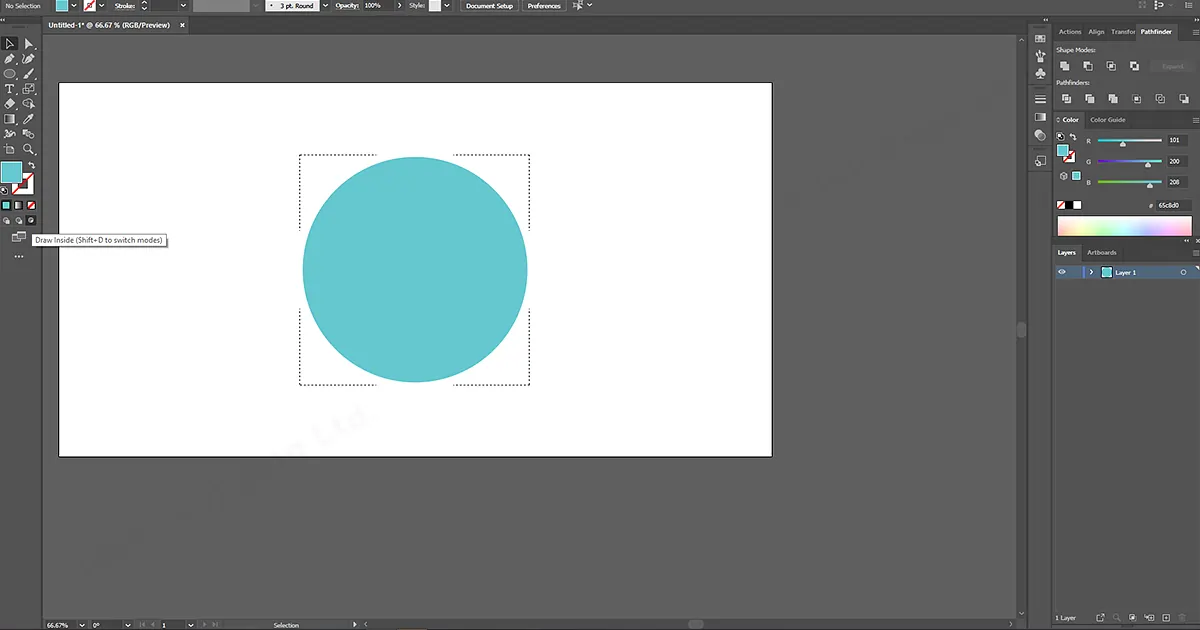
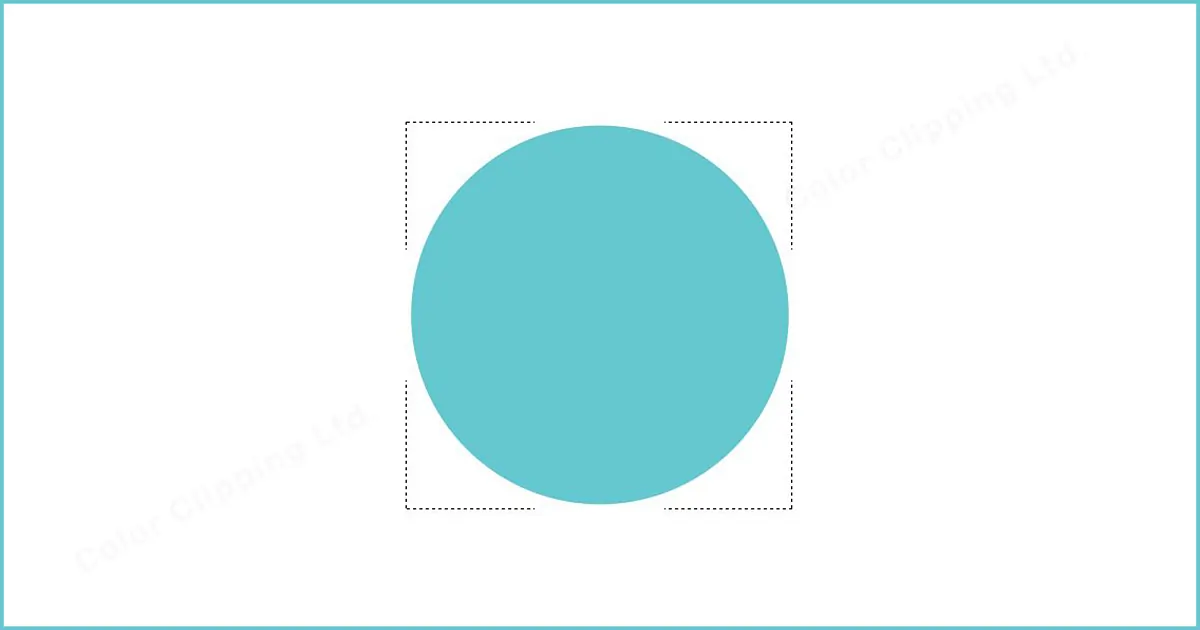
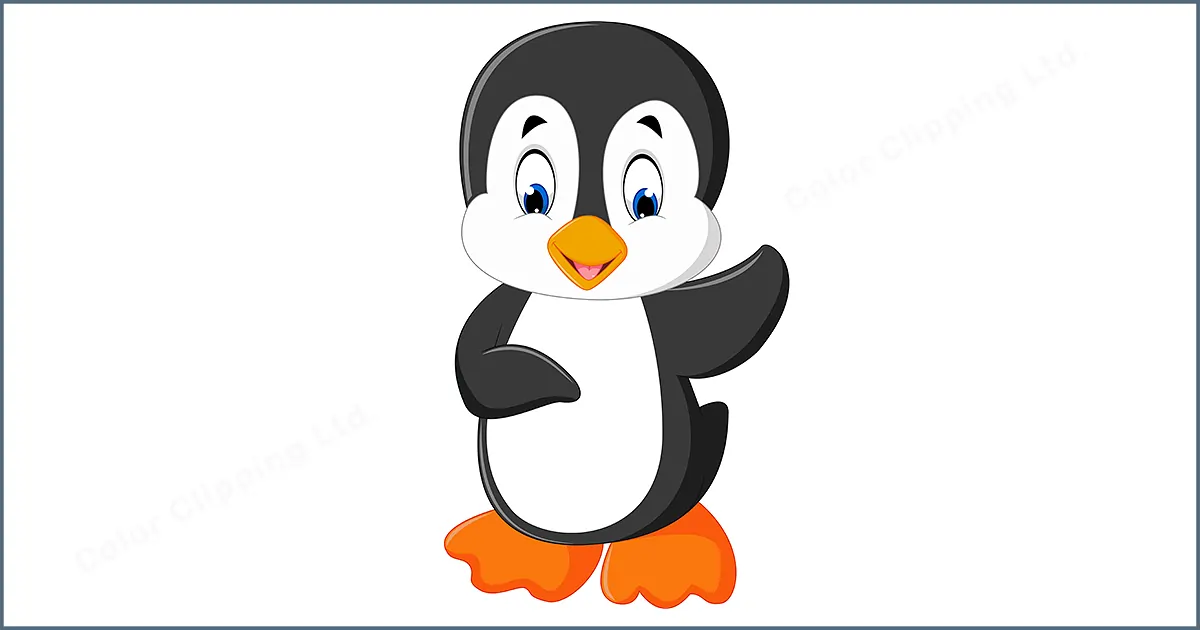
Draw Inside masking in Adobe Illustrator
Adobe Illustrator Mask is used to draw or add shapes inside a shape or object. Through which the work or design won’t cross the border of that specific shape.
How to use Draw Inside Mask in Adobe Illustrator
- You have to select an object which you want to work for and open it in Adobe Illustrator
- Go to the left-sided toolbar and select Draw Inside (Shift + D to switch modes), You will see a border outside the shape/object
- Now select the shape or drawing that you want to have inside the shapes.
- Drag to paste the drawing/shape inside the shape. And you will have that.
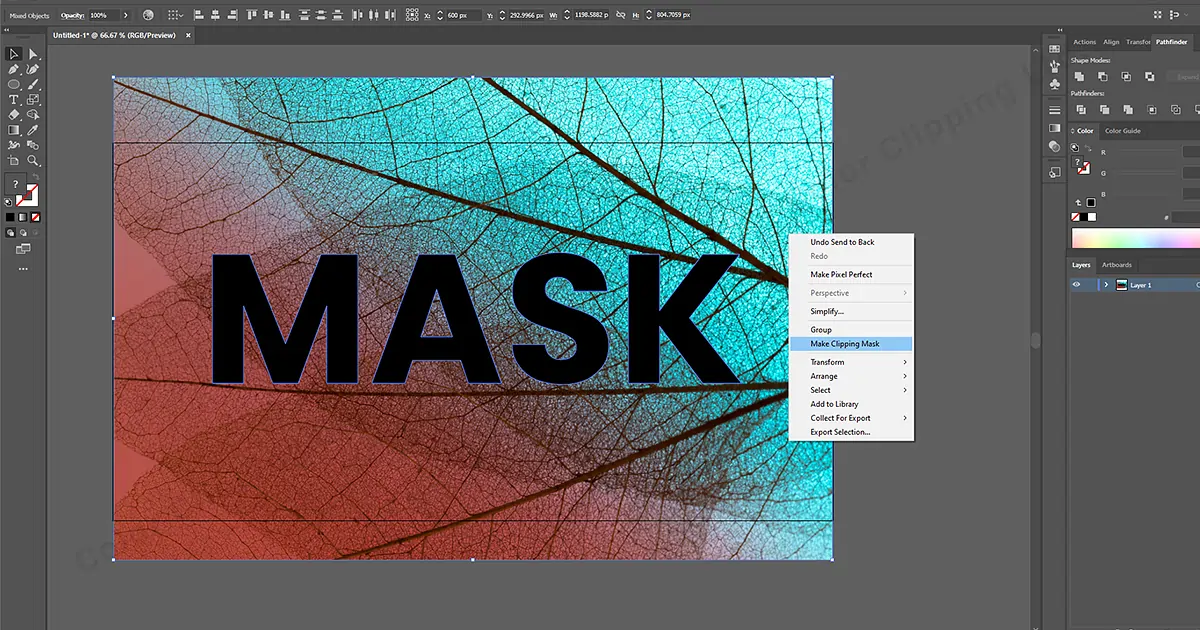
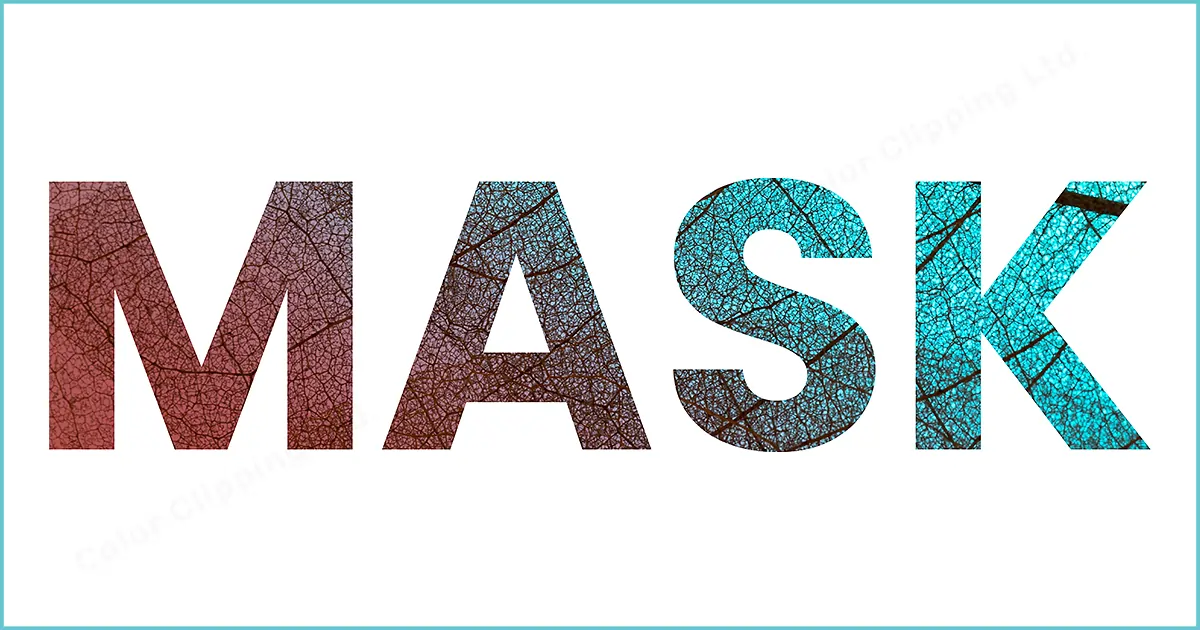
Clipping Mask in Adobe Illustrator
If you want to show the underneath image on the top in a very specific space or portion then you can go for a clipping mask. Didn’t catch it? Take a piece of paper. Draw a square in it. And cut out the square. Put that paper over a picture. You can see some parts of the picture through the cut-out square. That’s exactly how Clipping Mask works.
How to use Clipping Mask in Adobe Illustrator
- Open the image on Adobe Illustrator and create the shape you want on the image.
- Select the object and shape together
- Right-click on the mouse and select Make Clipping Mask and there you have it.
There are way more ways to do Clipping Mask but this is the easiest way to do it.
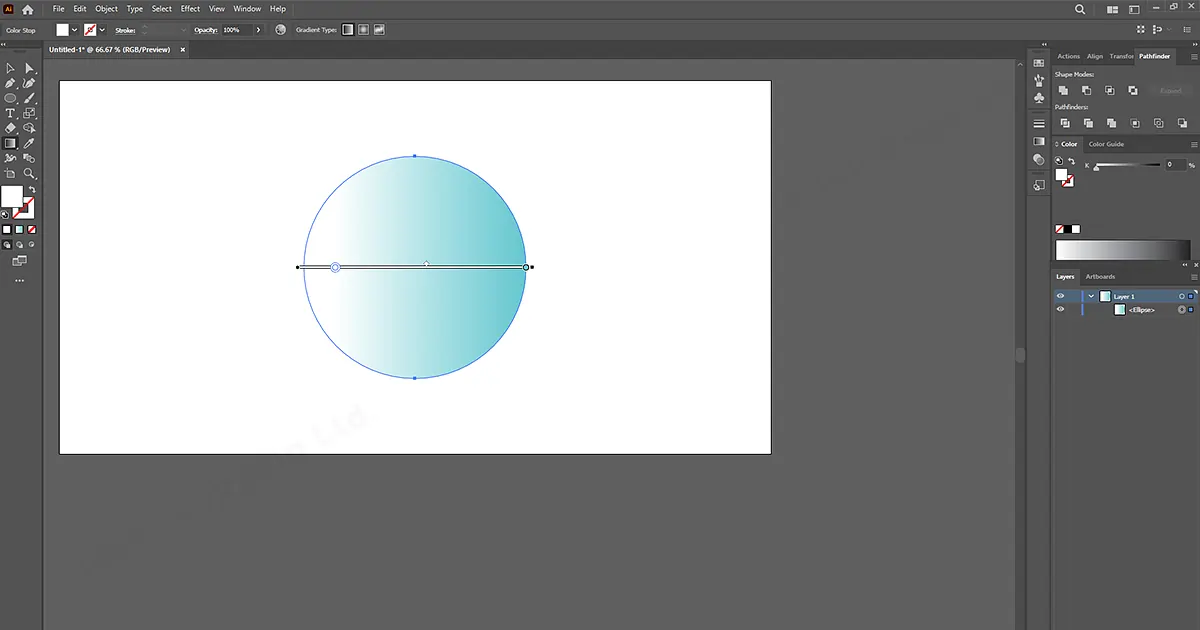
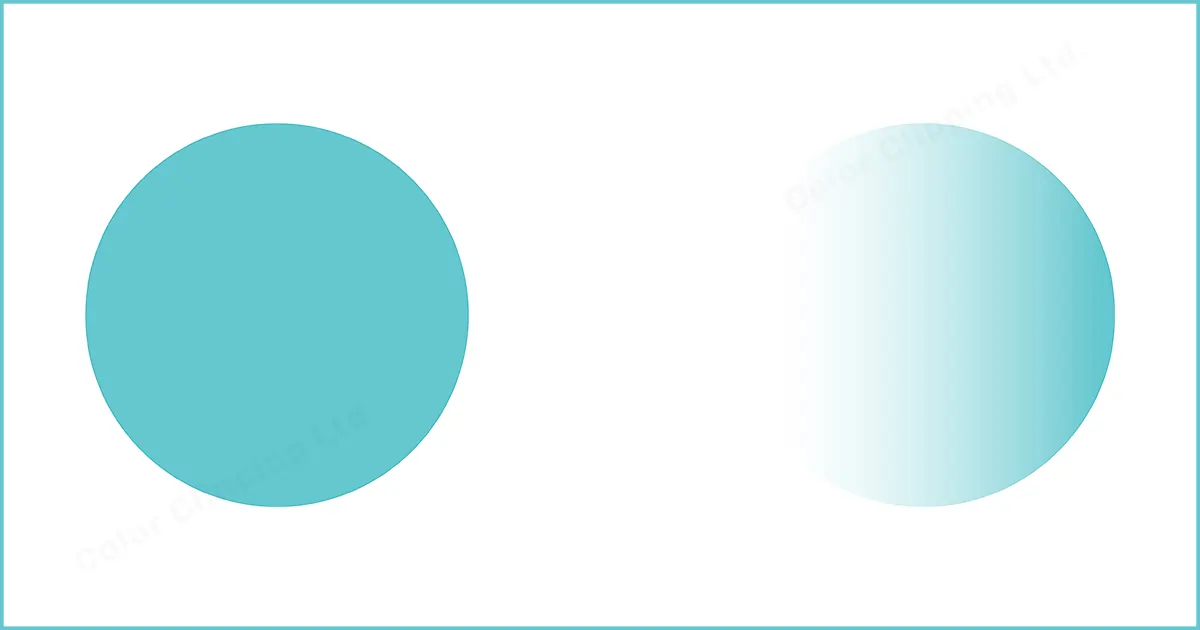
Opacity Masking in Adobe Illustrator
Opacity mask is similar to Clipping Mask but it works with gradients (mostly) in the selected areas. It is similar to Layer Mask from Adobe Photoshop
How to use Opacity Mask in Adobe Illustrator
- Create a box slightly bigger than the object
- Add gradients into the created box.
- Select two boxes together and go to the transparency panel.
- Then select Make Mask. Keep in mind the black-sided part will be blended to vanish and the white part will show up.
So, with that, our short learning ends here. Yes, short. Because all of these are vast sectors that cannot be learned with only one blog. They all have way more working ability than you imagine.
Conclusion
If you are looking for what to use, this blog might be helpful for you. But if you want to master a particular sector then this blog is a perfect beginner for you. You can always choose what platform you should go for. All of the above software has pros and cons. Photoshop has more options than any other and also has many features compared to others. Also, it might seem tough to use for beginners. They might get stuck in a very confusing situation if everything doesn’t go how they have seen it on a tutorial or read its tutorial somewhere. So as the others. Lightroom is best for color grading. If you want to do anything with colors, go for Lightroom. And the illustration is easy to use compared to Photoshop but yet it’s not always best when it comes to photos. But best for the graphics design indeed.
FAQ
Image masking is used to edit an image with more flexibility. From erasing to adding everything is easy and reliable for editors.
Yes, Adobe Lightroom is available in the app also. It has almost every feature with the same process of editing. Anyone who wants to edit photos with Lightroom can do so.
Image Masking is not Text masking but Text masking is Image Masking. Masking an image with text comes under image masking since you have to work with images but image masking does not include text every time so it is not text masking.