Photo Editing

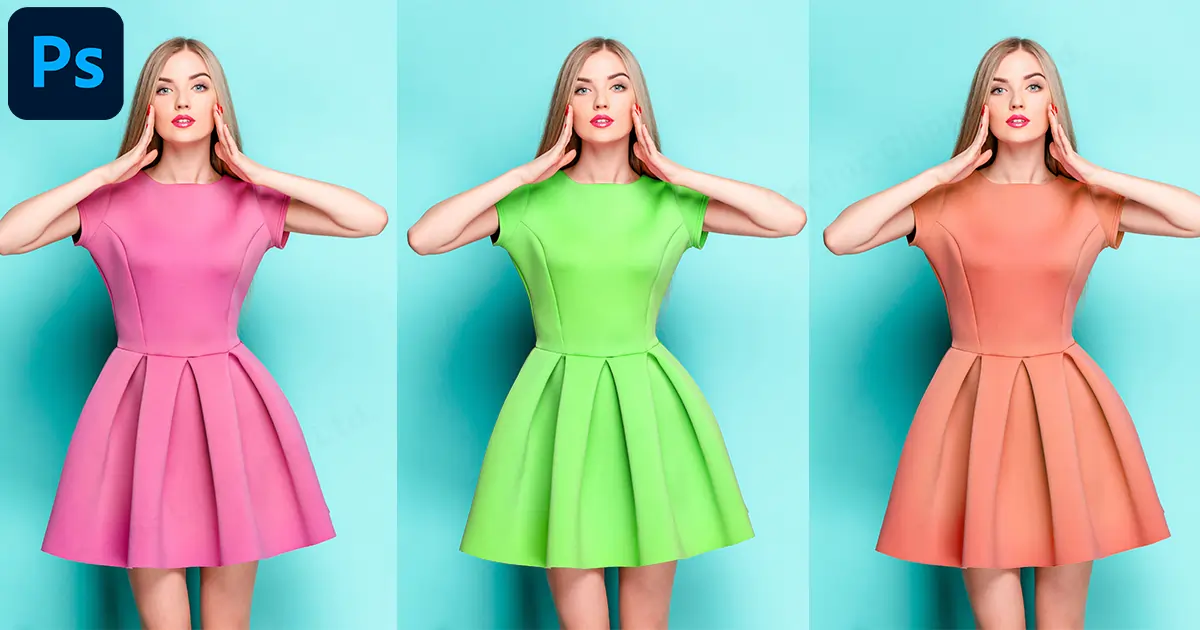
If you are a professional photographer and do clients' product photography then you might wonder why you should learn How to Change Color of an Image in Photoshop. Most of the time clients have products in different colors. Sometimes they even offer color customization to their customers. Then the work comes to your shoulder. Normally, the photographers also do photo post-processing work for their clients. Even if you are not the photographer, you are the photo editor, or even the owner of one of those products you know a product can come in different shades, and that needs to be showcased. But how to showcase those shades in a picture if you don’t know how to showcase them? That’s why it’s important to know How to Change Color of an Image in Photoshop.
There are many ways to follow when it comes to changing the colors of a photo in Photoshop. Different techniques will work differently on different products. Photoshop is one of the oldest photo manipulation software of all time. Not only the oldest but also reliable. That’s why in this blog I’m going to talk about a few color-changing techniques surrounding Adobe Photoshop. Let’s start with the first technique which is…
Recoloring an image in Photoshop is not a new concept. It’s quite an old pattern/method. Now, there are plenty of ways to do this recoloring.
Open the image in Adobe Photoshop. Then go to the right down the bottom and there you will see a circle icon. Click on it and you will find a drop-down menu. Select the Hue/Saturation option.
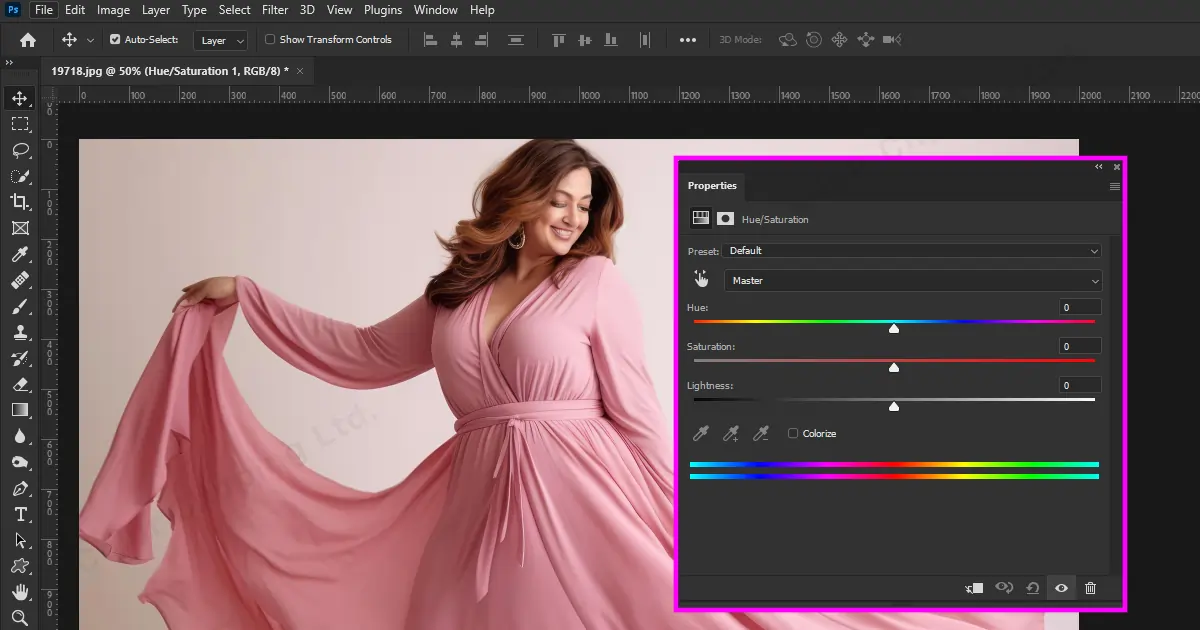
Then you will have a panel of Hue/Saturation. From that panel click on the ‘Hand Tool’. You will find this ‘Hand Tool’ just under the preset and above the Hue option.
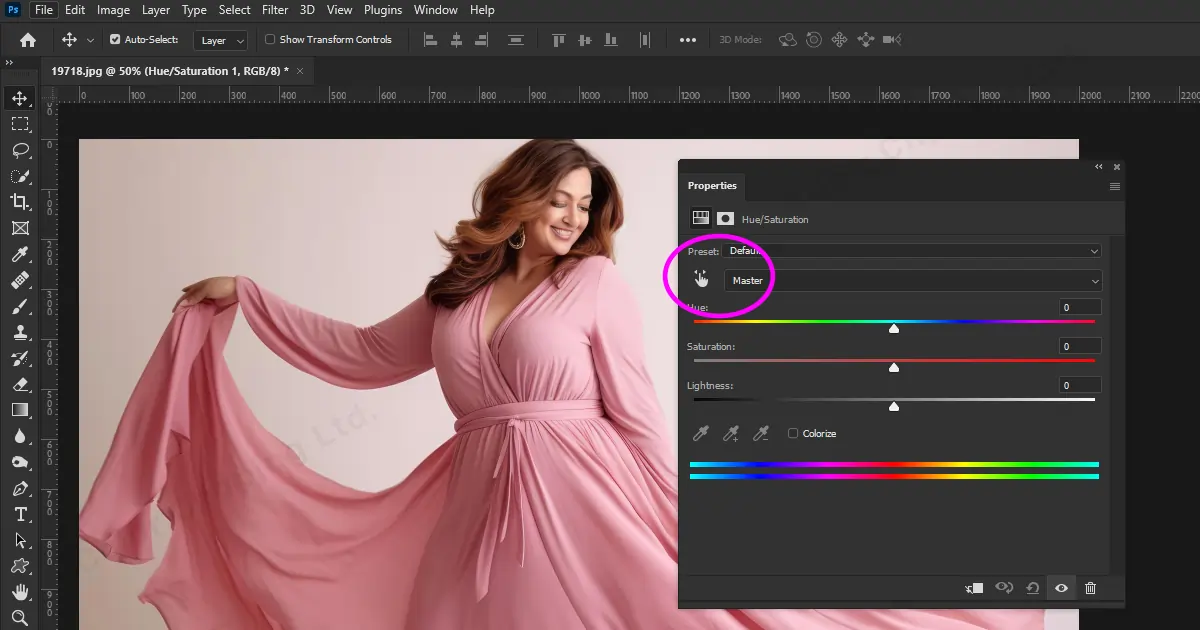
After selecting the ‘Hand tool’ you will have a drop cursor. Take the cursor to the object or the place where you want to change the color and click on there.
Then drag the Hue point all the way to which color you want the object or the place to be. Also, you have to expand the range from the bottom scale to have an even smoother transaction. Now look at the image and if you see there are still some places, where the transaction is not smooth, then expand the meter even more.
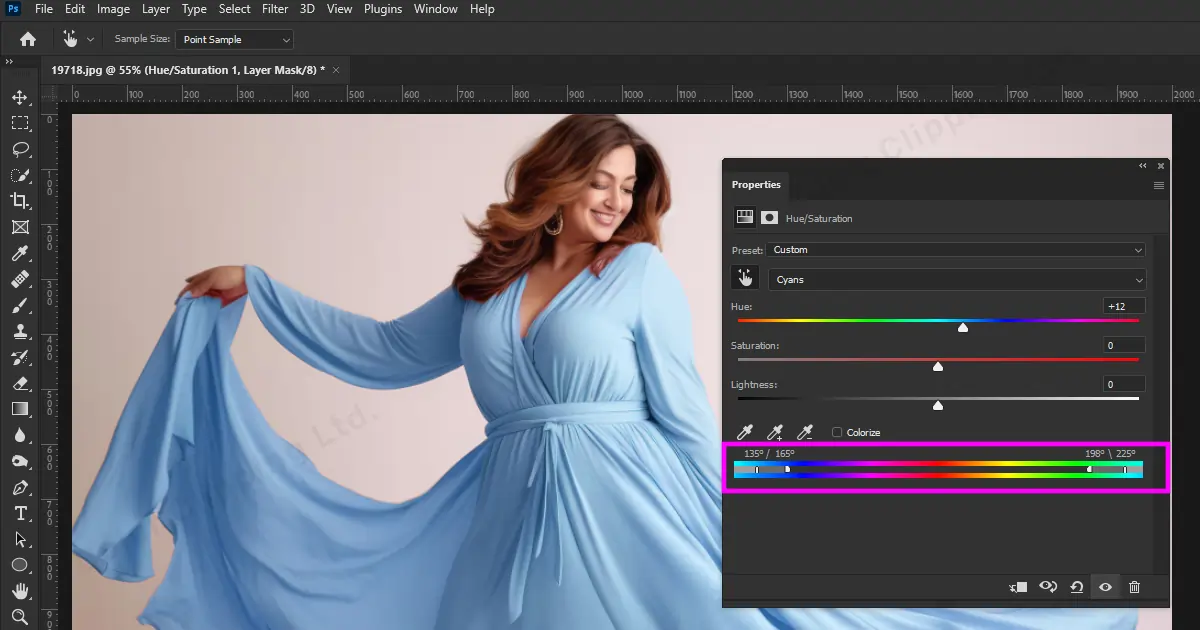
That was pretty much the main thing. Now, you can move the anchor point of Hue to select whatever color you like. You might also need to adjust the saturation anchor to make the color even more vibrant or pale.
This technique was the easiest technique followed by professional photo editors and retouches. And the best thing is this method doesn’t need much practice to grab. But yes, only if you have an eye for tasteful colors and are a bit good at color matching.
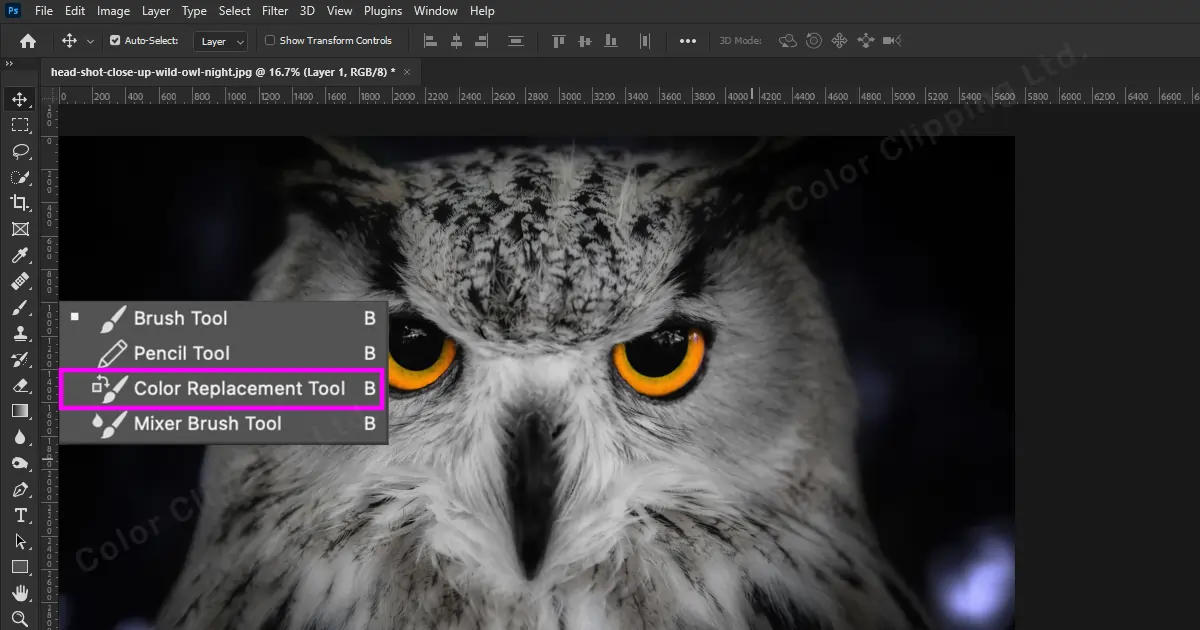
In this part let’s focus on the ‘Brush Tool’. You can change the color using the Color Replacement Tool which is almost similar to a brush tool. Let’s find out how to use this Color Replacement Tool to change the color of any object of choice.
Open the image that you want to edit in Photoshop.
Select the Color Replacement tool from the brush panel. (You will find the Color Replacement Tool in the left toolbar’s brush’s drop-down menu)
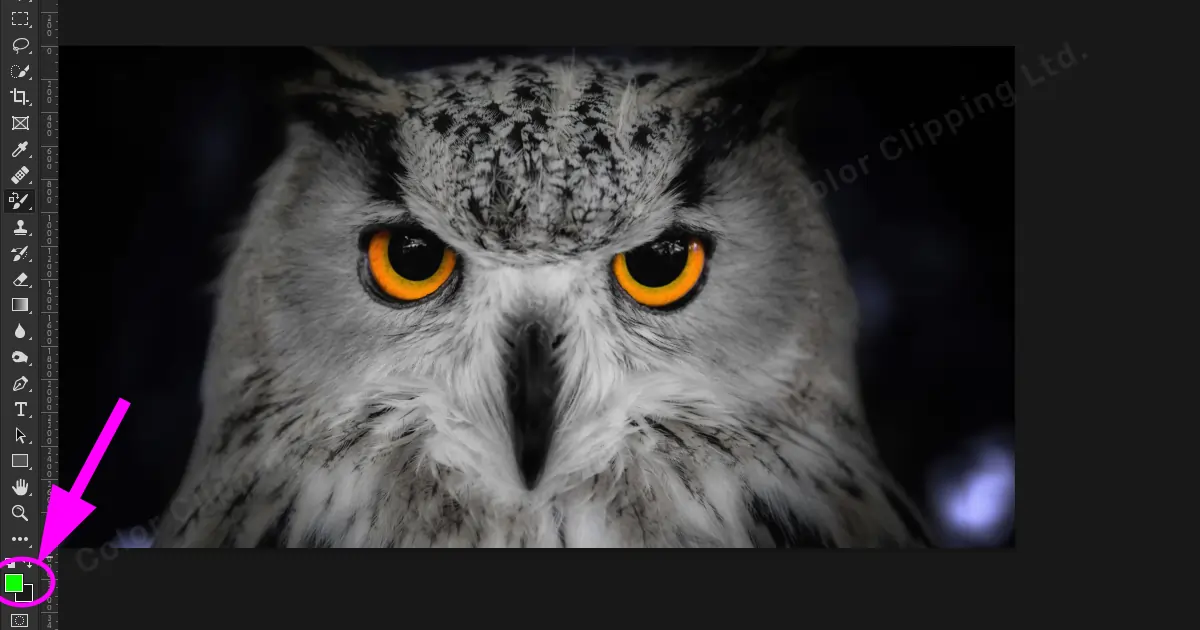
Now on the bottom of the left toolbar, you will see two squares. One over another. Click on the upper box and select the color you want to place on your desired place.
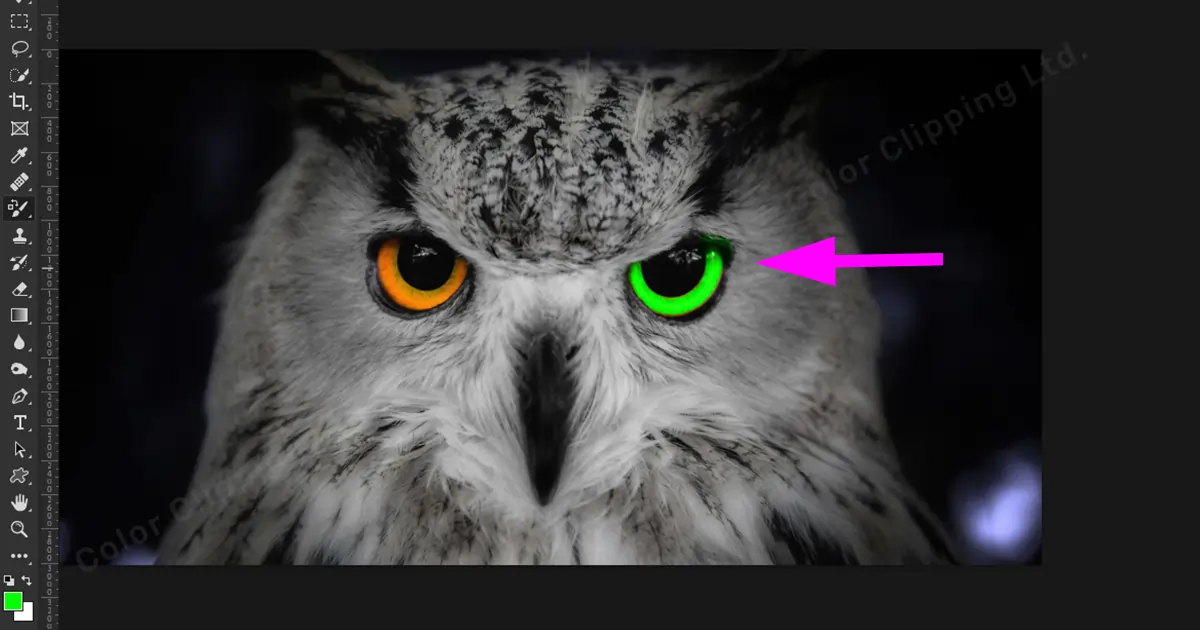
Now click and drag on the part where you want to change the color. It will change the color precisely.
This Procedure is also so simple.
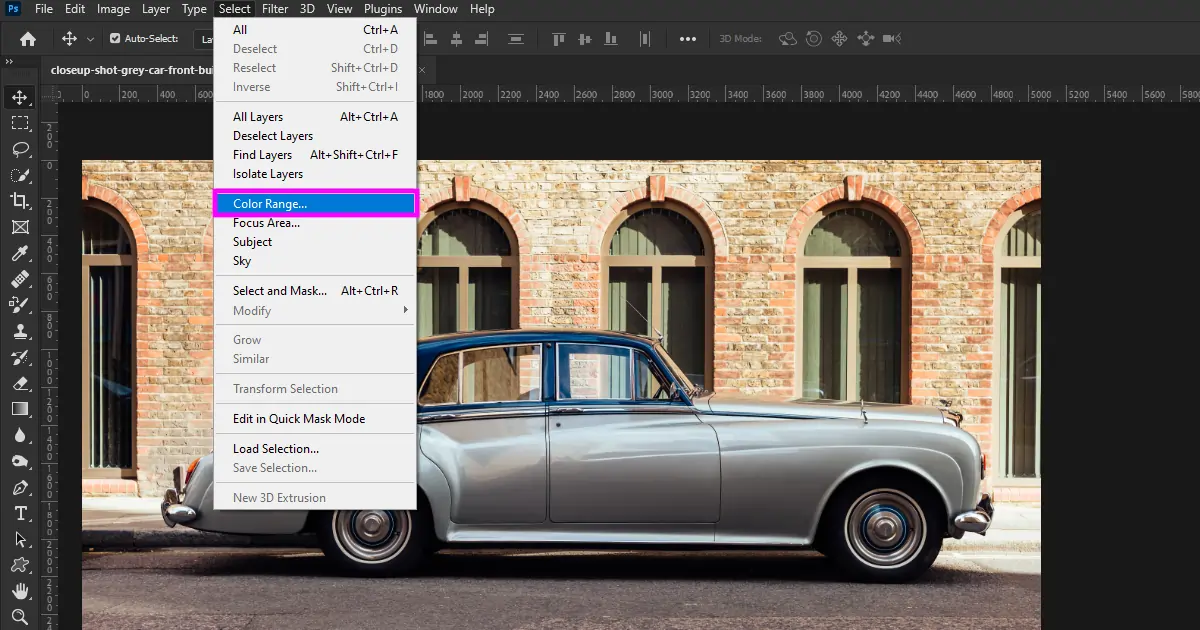
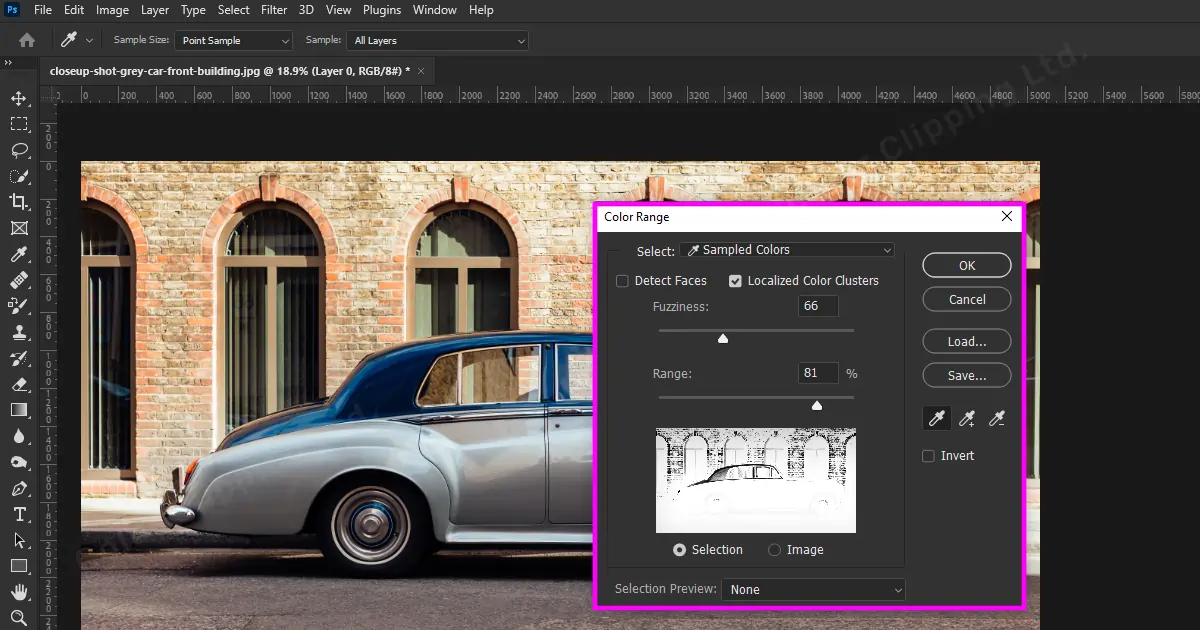
Let’s see a third way to complete the task. These two are already easy ways. Now the technique that I’m going to talk about is Color Range. You can also choose Color Range to change the color of your photo. Let’s see how…
Open the image that you want to edit on Adobe Photoshop.
Go to the top toolbar and select the ‘select’ menu. And from the drop-down option select ‘Color Range’.
Select the base color of the object which you want to change by clicking on the color.
Hold on to the Shift key and click on the areas that haven’t been selected or get hidden because of the shadow. You can also adjust the fuzziness and range to get more precious object selection. Once you are happy with the selection press the “Ok” button on the pop-up panel.
Now again select the hue/Saturation adjustment layer from the right bottom circle looking icon.
Adjust the Hue/Saturation to get the desired color. If anything, out of the object gets colored then use a black brush in the layer and hide those areas. That’s it. After some time you will be able to recolor in just 1 minute.

There are many more techniques and ways to achieve this color change. But these 3 methods are the easiest and most effective. And most importantly these will help in any kind of color-changing task. Besides these techniques you can also get some presets in Adobe Photoshop. But those will work as a filter. You eventually have to edit if you want to customize anything special in the picture including color changes.
Deowan Shimul
Since 2010, Deowan Shimul has been refining the art of jewelry retouching, combining precision with advanced technology. In 2017, he expanded his expertise into commercial product photography and now leads a team of 120 professionals. Together, they produce high-quality visual solutions that help brands grow, streamline workflows, and achieve real results for clients worldwide.

Chief Production Officer