Photo Editing

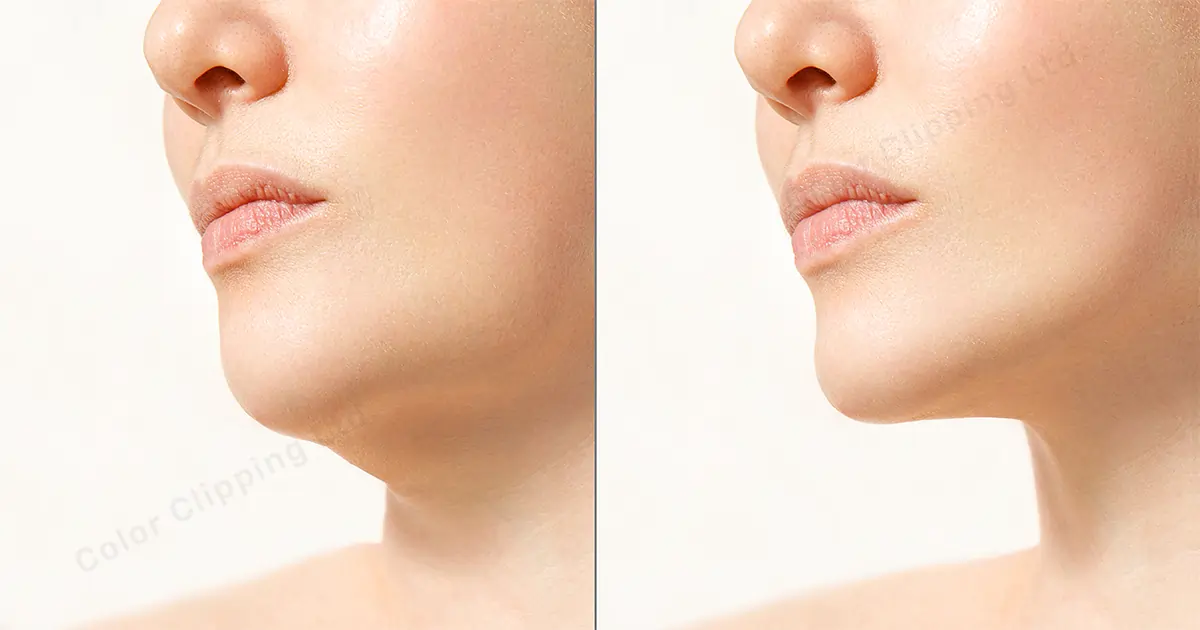
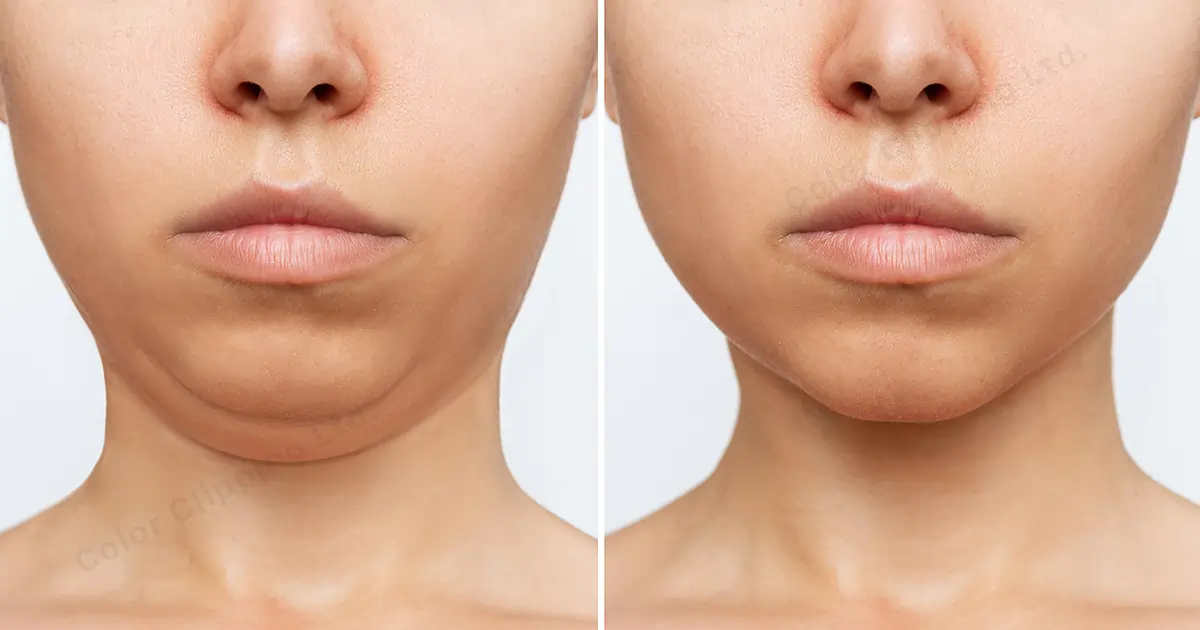
We all want to look beautiful. All want to look fit and healthy. From that point of view, we all wonder how to blur pimples, how to remove dark circles, how to remove the double chin, how to remove dark spots, and how to make the skin look flawless. How to do so? Do exercise and diet. But that will take a long time. But I can show you how to do so intently within 5-6 mins with the help of Photoshop. Well can’t lose weight like that but can make you look like so. So, let’s learn how to remove double chin in Photoshop today…
Photoshop can be a magic box sometimes. It can create images that you imagine almost exactly the same. And again, you can edit or retouch some amazing images with the help of Photoshop. Let’s talk about the steps through which you can remove your double chin.
Open the image on Photoshop from which you want to get rid of your double chin.
Now make a copy of the background so that nothing won’t affect the original photo.
First, you have to select the upper or the front part of the chin, which you can keep in the picture. So, select the Pen Tool by pressing P on the keyboard. You can also select the Pen Tool from the left side’s toolbar.
Start outracing the upper or front jawline. Click the anchor point at the one-third (or where you think the jawline has started) of the face and create a path, click and drag following the line of the jawline. Imagine as if you are creating a new jawline.
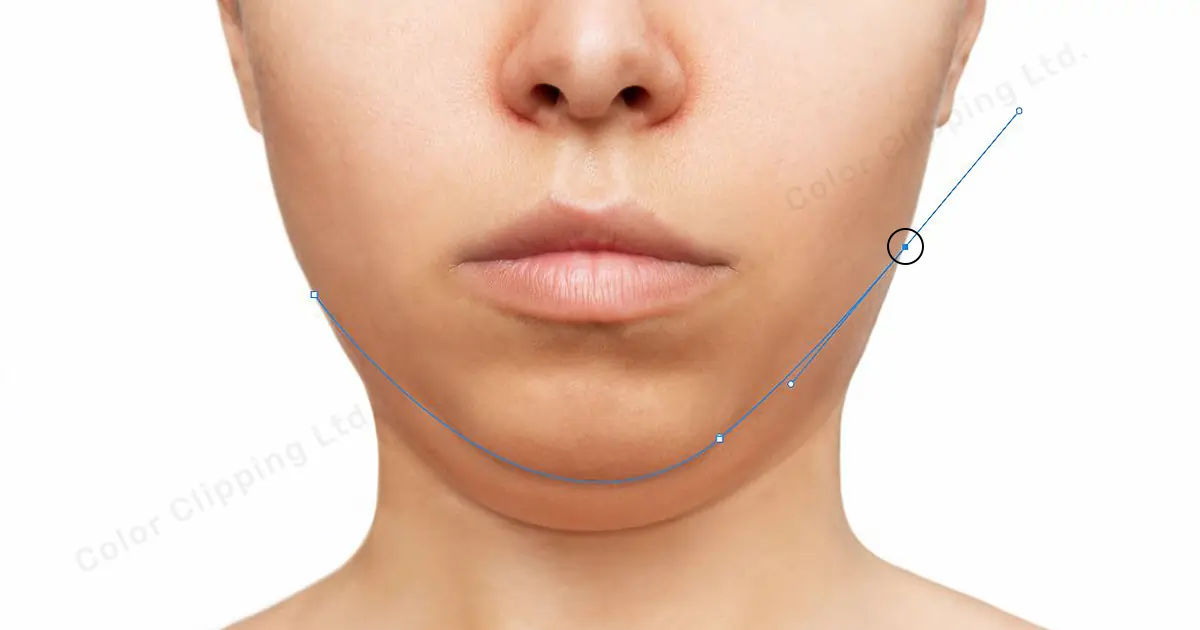
Randomly click outside of the selected image and try to avoid the face and bring it back to the first anchor point where you started the selection.
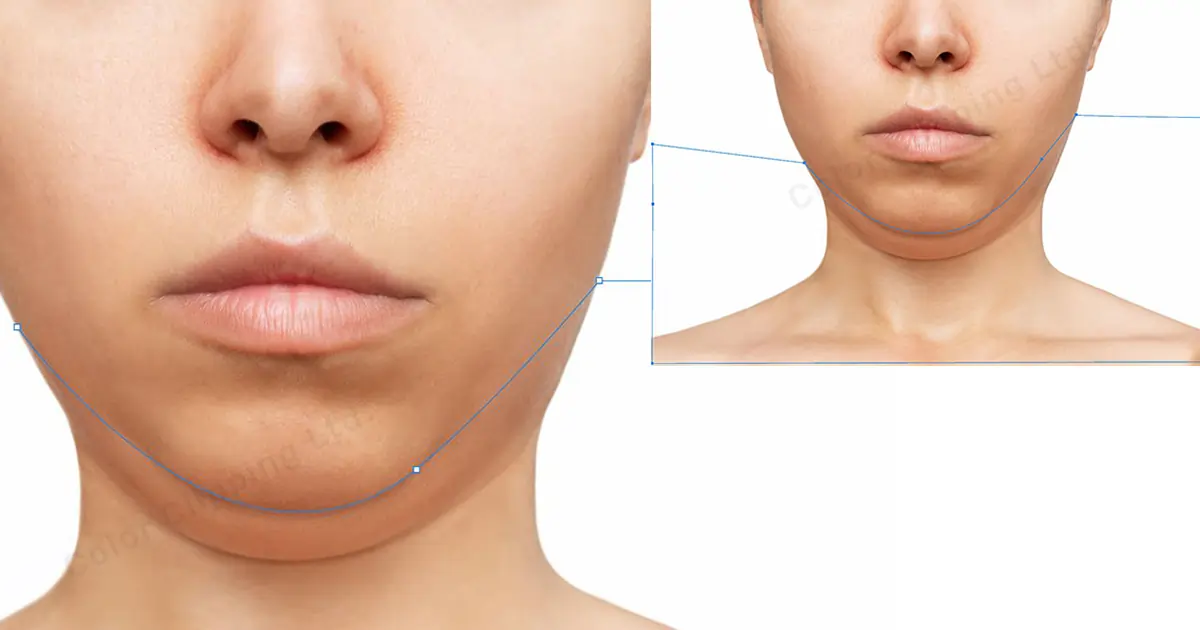
Go to Rendering> Feather Radius and set it to 1. By that, the edges of the cut-out won’t look very sharp and unrealistic. Don’t make it more than 1 otherwise it will also look unrealistic.
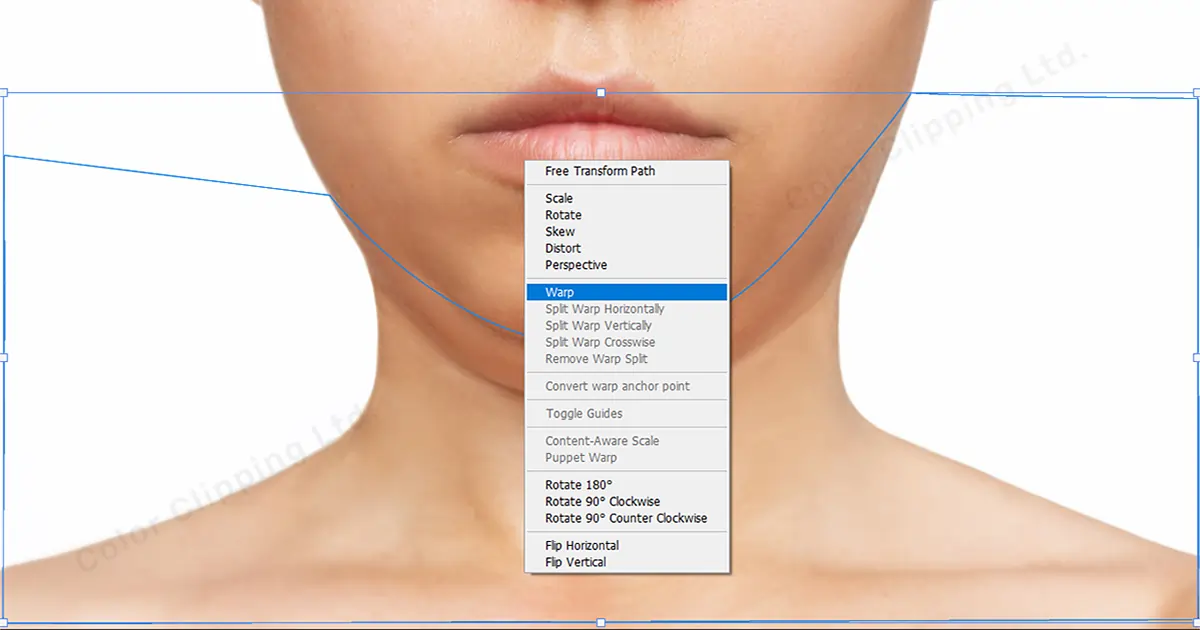
Now press Ctrl J to a duplicate of the selected part. Select the new layer that you just made by duplicating the selected parts. Now press Shift+ Ctrl+ I to select invert. Which is selecting the opposite of what you have selected previously.
Select the inverted image layer and press Ctrl+T. That way it will be transformed and now do a right click and select Wrap.
Set the grid on 5*5 and zoom on the bottom or lower chin. Now select the boxes where the bottom chin is visible and tuck them upwards as if you are hiding the lower chin behind the upper chin. Also, try to notice if everything is on point or not.
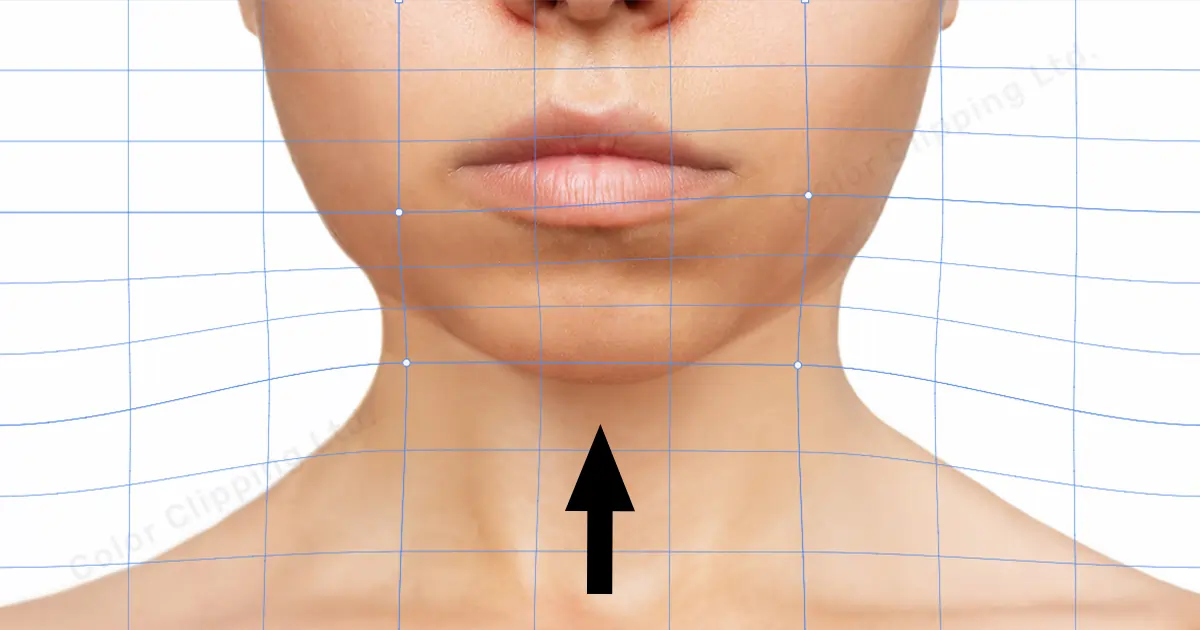
When you feel everything is looking good, click on the right mark on the top bar to stay committed to the picture. And here you go.
Well, there is no need in general. But in this world of social media perfection, everyone is running after perfection. Everybody wants to fit in the beauty standards. There are many debates on whether it is good or bad. If it is motivating you to exercise or maintain a diet and maintain a healthy lifestyle, then you should keep going. But sometimes it does the opposite. People can get depressed after looking at picture-perfect photos.
So, that’s a different topic. You do you. If you want to fit on the beauty standards and do. If you don’t feel comfortable then don’t. This is not mandatory but you can still give it a try. Maybe just to have an idea of how you might look without a double chin and to have some mental peace, you can choose Photoshop.
In every field, there are professionals and experts. It’s better to put the work on the professional’s hand. Especially when you think of Color Clipping Ltd. They will provide you a headshot photo retouching service. In the Headshot photo retouching service, you can get a professional profile or passport-looking photos.
In the headshot Photo Retouching Service, you can get your photos, from head to shoulder, edited. Usually, people take this service for official purposes but it can include a double chin removed.
Hope you will be able to remove your double chin easily after reading this. And also, if you have a bulk number of images that you want to remove double chin from then throw it to us. Color Clipping Ltd. will never disappoint you on quality and quantity. Photoshop can remove double chin but the perfection will come from the professional editor.

Hello, it's Anika, Content Executive from Color Clipping Ltd with a devotion to contributing my skills and knowledge more simply. Keep learning and growing with us.
Deowan Shimul
Since 2010, Deowan Shimul has been refining the art of jewelry retouching, combining precision with advanced technology. In 2017, he expanded his expertise into commercial product photography and now leads a team of 120 professionals. Together, they produce high-quality visual solutions that help brands grow, streamline workflows, and achieve real results for clients worldwide.

Chief Production Officer